Tracking staff attendance
Read the attendance dashboard and attendance report, and understand where staff punches come from.
FEMS records when your teachers, drivers, librarians, guards and office staff arrive and leave, then reports it three ways: a dashboard for today at a glance, a report for a date range, and a leave summary for balances. An HR admin lives on these screens; a payroll officer reads them before running a month.
Prerequisites
Go to Human Resources > Reports. It holds three screens: Attendance Dashboard, Attendance Report, and Leave Summary.
Your role needs access to each of the three separately, and exporting is a separate right again. A role can read a report on screen and still not see its Export button. Ask your FEMS administrator if a menu item is missing. Understanding roles and permissions explains how roles are put together.
Staff attendance is not student attendance
These are two separate systems inside FEMS that happen to share a word. They do not talk to each other.
| Staff attendance | Student attendance | |
|---|---|---|
| Who it covers | Employees on the HR payroll | Enrolled students |
| Where it lives | Human Resources > Reports | The student attendance screens |
| How it is captured | Punches from the attendance devices | Its own capture, including face recognition |
| What it feeds | Staff payroll deductions | Student records and guardian alerts |
Face recognition attendance is for students only. There is no face capture for employees. Nothing you do on a student attendance screen changes a staff record, and nothing on this page changes a student record.
Where staff attendance comes from
Staff attendance is device-driven. The biometric and card terminals at your gates and offices are the only thing that creates a staff attendance day. FEMS has no screen where an HR admin types in a member of staff's daily in and out times.
Depending on how your school is set up, the punches reach FEMS one of two ways:
- FEMS reads them from the device software's own database on a schedule, every few seconds.
- The device software pushes each punch into FEMS as it happens.
Both produce the same result on the reports below. Which one your school runs is a setup choice made when FEMS was installed, and only your FEMS platform administrator can see the health of those connections. If punches stop arriving for everybody at once, that is the first thing to ask them to check.
What links an employee to their punches
Every terminal stamps a punch with a number for the person who punched. How FEMS turns that number into an employee depends on which of the two setups above your school runs.
- When FEMS reads the device software's own database, the number programmed into the device has to equal the employee ID on the employee's current employment record.
- When the device software pushes punches in, FEMS looks the device's number up against the Attendance Device UID recorded on the employee. Set that field on the employee record rather than reprogramming the terminal.
Either way the link is one number, and it has to be right. If the number does not match, or the employee has no active employment record on the date of the punch:
- The punch is still received and kept.
- No attendance day is created for that person.
- They look absent on every report on this page.
If you do not know which setup your school runs, check the Attendance Device UID field on the employee record first. It is the faster of the two to correct, and it is the field the product itself describes as the link between an employee and the punches from their enrolled card, fingerprint or face ID. It sits on the profile card of the employee's record and is set from the record after the person is created, not in the add-employee form. Employee records are covered in Employee records.
Once the numbers agree, have the employee file a correction for the days already lost.
Two more reasons a punch can arrive and still produce nothing: the terminal's clock is far enough off that FEMS rejects the time, or the employee was added to FEMS after the punch landed. FEMS retries the second case by itself every few minutes. A rejected clock time is never retried, so a terminal with a wrong date needs someone on site to fix the clock.
What FEMS keeps from a day's punches
FEMS keeps the earliest punch of the day as In Time and the latest as Out Time. Nothing in between is stored.
So for someone who punches four times, FEMS shows the first and the last. Working Hours on the reports is the gap between those two punches, not time actually worked. Lunch breaks, site visits and mid-day exits are inside that number, not subtracted from it.
If only one punch exists for the day, it is treated as the In Time and Out Time stays empty.
When a punch is missing
There is no "missing punch" warning anywhere. What you see instead depends on which screen you are on.
| What happened | What you see |
|---|---|
| No punch at all that day | The day does not exist. It never appears on the Attendance Report. The Attendance Dashboard works out from the calendar that it was a working day and shows Absent. |
| Punched in, never punched out | The day appears with an In Time and a dash for Out Time and for Working Hours. |
| Punched in, never punched out, on a past date | The same day can later be marked Early Departure once FEMS recalculates the period, for example after a timetable change. |
| Punch received but no matching employee | Nothing is created. The person shows as absent. |
Fixing a wrong or missing day
Corrections are filed by the employee, not entered by HR. From Self Care > Attendance & Leave the employee files an attendance application of one of three types:
| Type | Use it when |
|---|---|
| Manual Attendance | There is no attendance day at all and the employee wants one added, with the In Time and Out Time they supply. |
| Late Arrival | The day exists and is marked late, and the employee is asking for the late mark to be excused. |
| Early Departure | The day exists and is marked early, and the employee is asking for the early mark to be excused. |
A reporting manager can file on behalf of a direct report. From there the request goes to the reporting manager to recommend and to the configured approver to approve, which is covered in Handling leave and staff applications. The filing side is covered in Attendance and leave in Self Care.
The server enforces one rule that surprises people: an attendance application has to be filed for today. A staff member who notices a wrong day last week cannot file for it from Self Care, even though the form can display a wider date range.
Attendance Dashboard
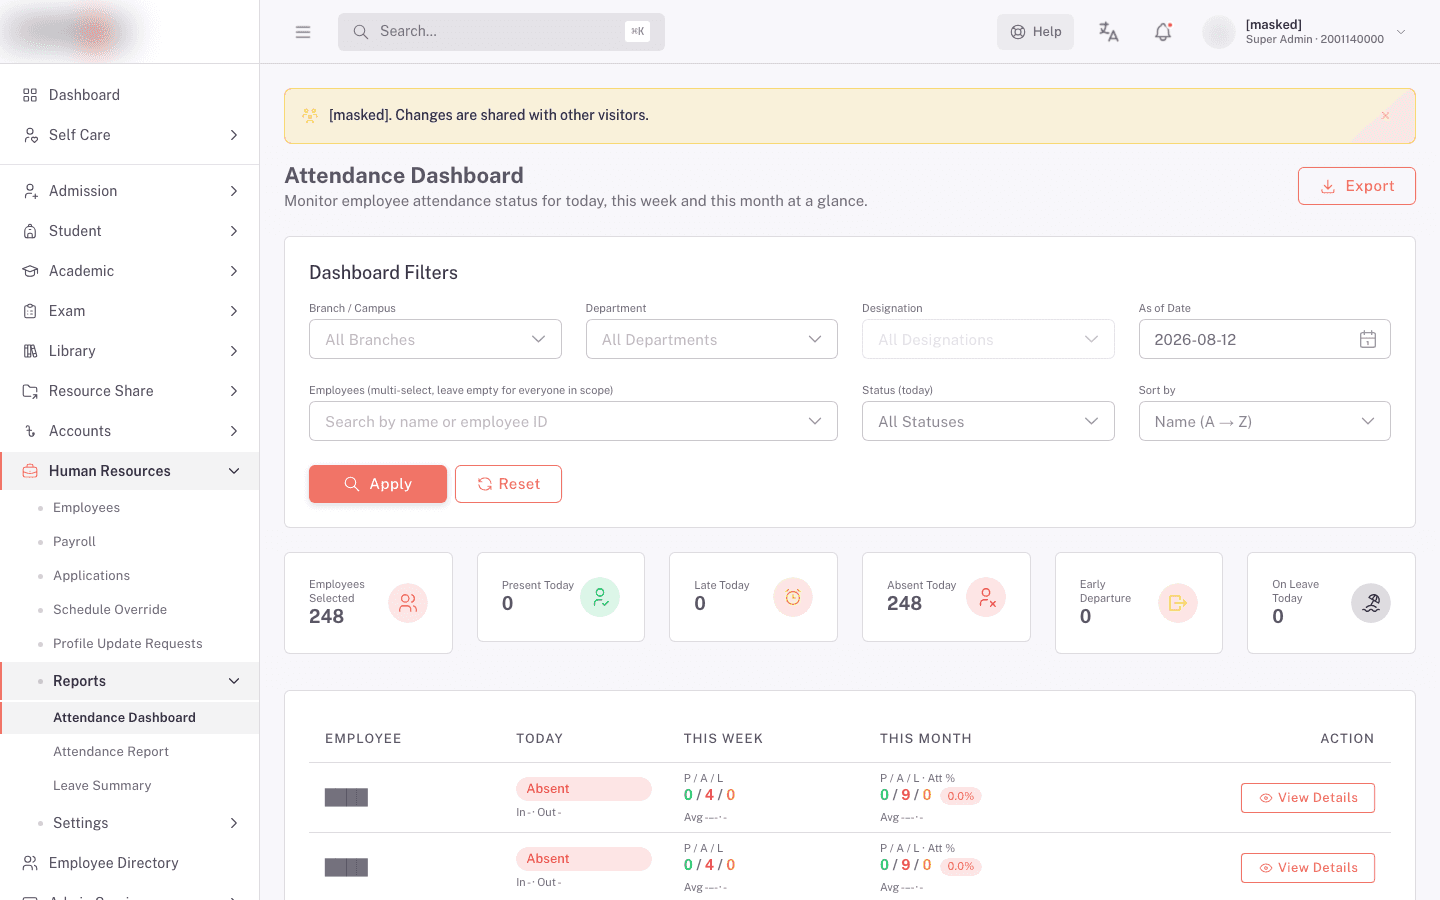
Go to Human Resources > Reports > Attendance Dashboard. It answers "who is in today, and how has this group been doing this week and this month".
Its subtitle reads Monitor employee attendance status for today, this week and this month at a glance.
Filters
The filter card is headed Dashboard Filters.
| Filter | What it does |
|---|---|
| Branch / Campus | Limits the list to one campus. Defaults to All Branches. |
| Department | Limits the list to one department. Defaults to All Departments. |
| Designation | Stays disabled until you pick a Department, then lists only that department's designations. |
| As of Date | The day the whole dashboard is anchored to. Defaults to today. |
| Employees (multi-select, leave empty for everyone in scope) | Type at least 2 characters to search by name or employee ID, then pick as many people as you want. Leave it empty for everyone the filters above allow. |
| Status (today) | Narrows the table to Present, Late, Early Departure, Absent or On Leave. Defaults to All Statuses. |
| Sort by | Orders the table by name, attendance percentage, late count or absent count, high to low or low to high. Applies as soon as you change it. |
Click Apply to run the other filters. Click Reset to clear everything, put the sort back to Name (A → Z), and set As of Date back to today.
Change As of Date to look at a past day. The week and month figures move with it, so setting it to the last day of last month gives you last month's picture.
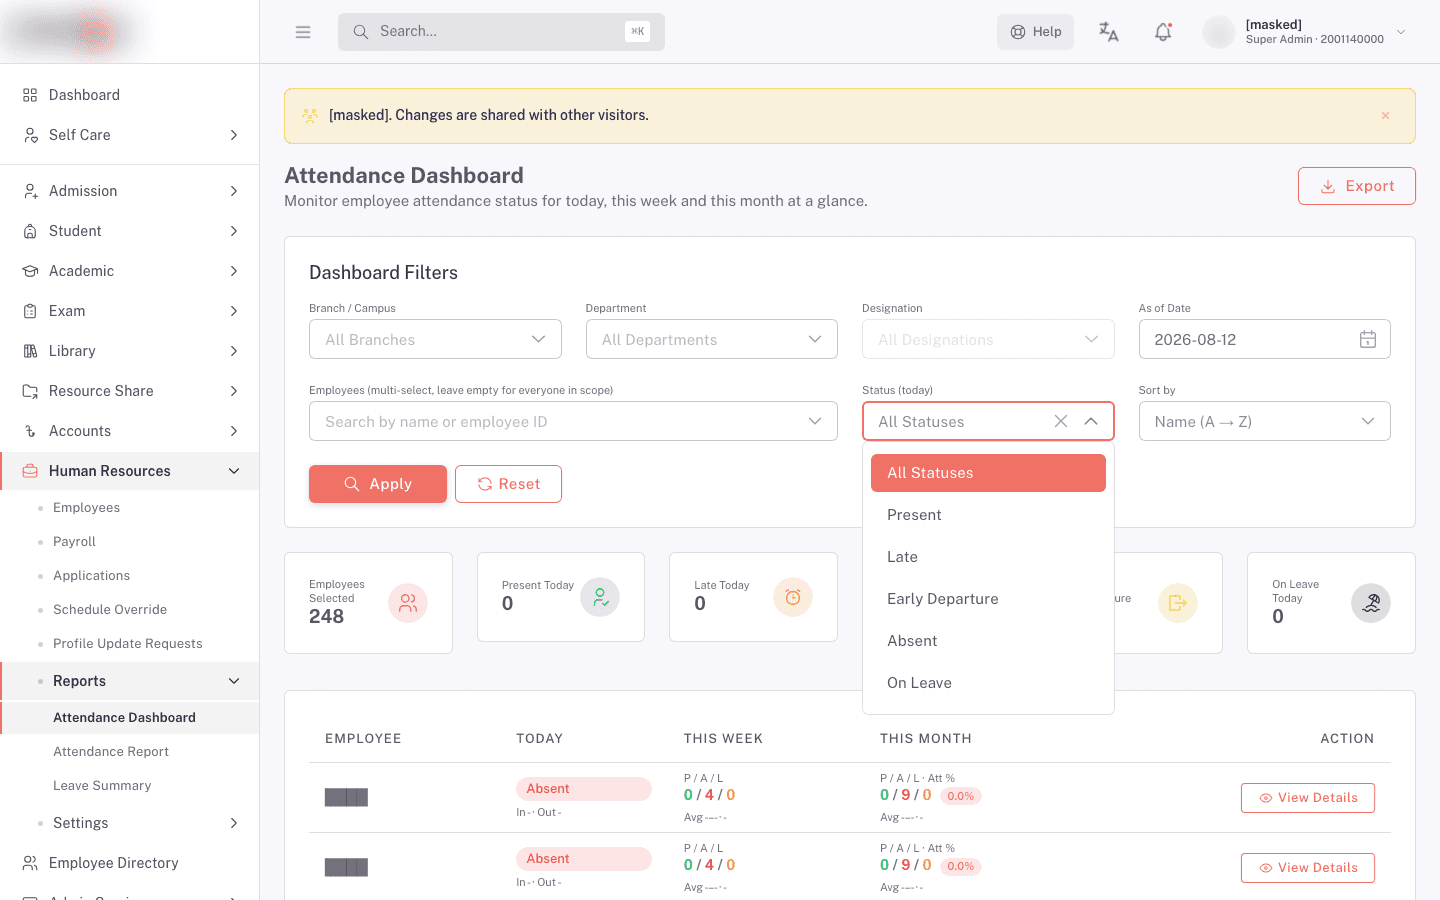
The six figures at the top
| Figure | What it counts |
|---|---|
| Employees Selected | Active employees matching your filters. |
| Present Today | Everyone who has an attendance day. A late arrival still counts as present here. |
| Late Today | Everyone marked late today. |
| Absent Today | Everyone with no attendance day on a working day. |
| Early Departure | Everyone who left before their scheduled end time today. |
| On Leave Today | Everyone on approved leave today. |
Two things to know before you quote these numbers in a meeting.
- They ignore the Status (today) filter. The six figures always describe your whole campus, department, designation and employee selection. Only the table below reacts to Status (today).
- They do not add up to Employees Selected. One person can be counted in both Present Today and Early Departure, and anyone whose day is a weekend or a school holiday is in none of the six.
How today's status is decided
FEMS works down this list for each person and stops at the first match.
- The date is a school holiday on the institution calendar, so the status is Holiday.
- The date is covered by an approved leave application, so the status is On Leave.
- An attendance day exists, so the status is Late if the arrival was late, Early Departure if the exit was early, otherwise Present.
- The date is a Friday or a Saturday, so the status is Weekend.
- Nothing above matched, so the status is Absent.
Friday and Saturday are the weekend for this dashboard and for the payroll working-day count. Those two are fixed, and no setting changes them. An employee's own Work Schedule can still mark other days as their weekend, but that governs their daily timetable rather than these two figures. To make a Friday or Saturday count as work, add a Working Day override, described in Setting holidays and extra working days.
The table
Columns: Employee, Today, This Week, This Month, Action.
- Employee shows the name, the employee ID, the department and the designation.
- Today shows the status chip, then the in and out times, then the hours worked, for example
In 9:08 AM · Out 5:35 PMand8h 27m. A time FEMS does not have renders as a dash. - This Week and This Month show present, absent and late counts, followed by average in time, average out time and average hours. This Month adds the attendance percentage, which is present days divided by working days.
- Action holds the View Details button.
No column header sorts. Use the Sort by filter. Rows per page can be 10, 25, 50 or 100, and starts at 25.
When nothing matches you see No employees match the current filters.
One employee in detail
Click View Details on a row to open that person's own attendance page. It opens with:
- A profile card with the employee ID, department, designation, campus, joining date, and an Active or Inactive chip.
- Three bands, TODAY, THIS WEEK and THIS MONTH, each carrying present, absent and late counts, average in and out times, average hours, and the attendance percentage with the working days it was calculated from. Each band shows the exact date range it covers.
- Weekly Overview and Monthly Overview bar charts, one bar per day, coloured by that day's status.
- This Month Breakdown, a donut of present, absent, late and on-leave days.
- An Identity Summary for the month: total working days, present days, absent days, late count, early departure count, leaves taken, average in, average out, average hours, and attendance percentage.
- Leave Applications and Attendance Applications cards listing what that person filed this month, with dates, status and reason.
One thing to watch: the detail page has its own As of Date picker and it opens on today, not on the date you had set on the dashboard. If you were looking at last month and drill into a person, set the date again on the detail page.
Export
Export downloads a CSV named for the As of Date, for example attendance_dashboard_2026-08-10.csv. It carries the employee, department, designation, today's status, in and out times, the week and month counts, the averages and the attendance percentage.
It exports only the rows currently on screen, so it follows your rows-per-page setting rather than the whole result. Set rows per page to 100 before exporting a large department, or export a page at a time.
The button is disabled while an export is running and when the table is empty.
Attendance Report
Go to Human Resources > Reports > Attendance Report. This is the day-by-day list for a date range, one row per attendance day.
Filters and the date range
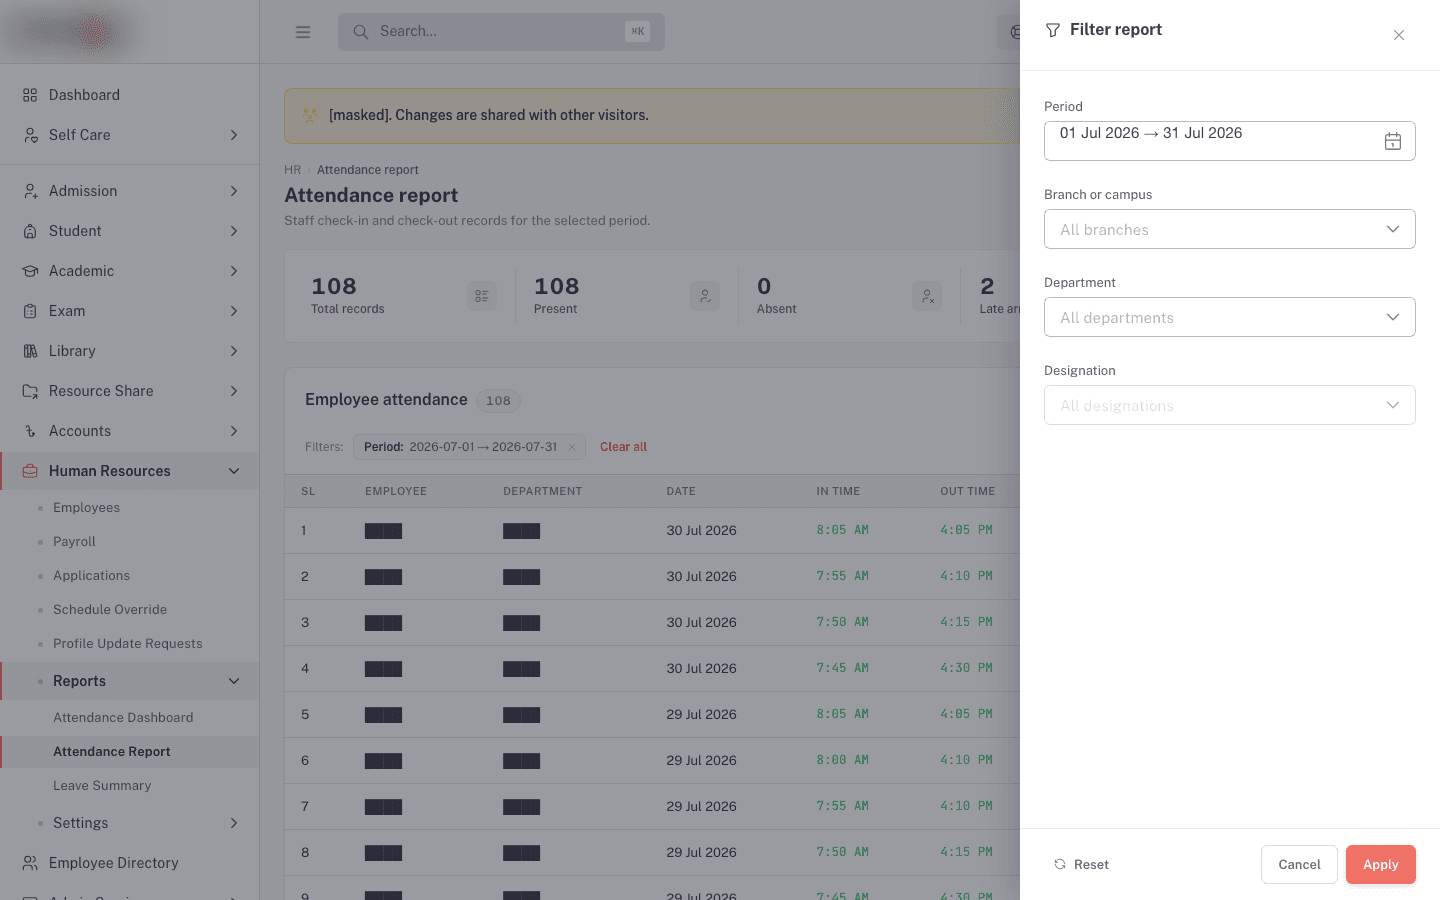
The filter drawer is headed Filter Report.
| Filter | Notes |
|---|---|
| Period | Select one date range for the reporting period. |
| Branch/Campus | Limits the report to a branch or campus. |
| Department | Limits the report to a department. |
| Designation | Cascades from Department. |
Click Apply to run the report, Reset to clear the filters, or Cancel to close the drawer without applying changes.
The five summary cards
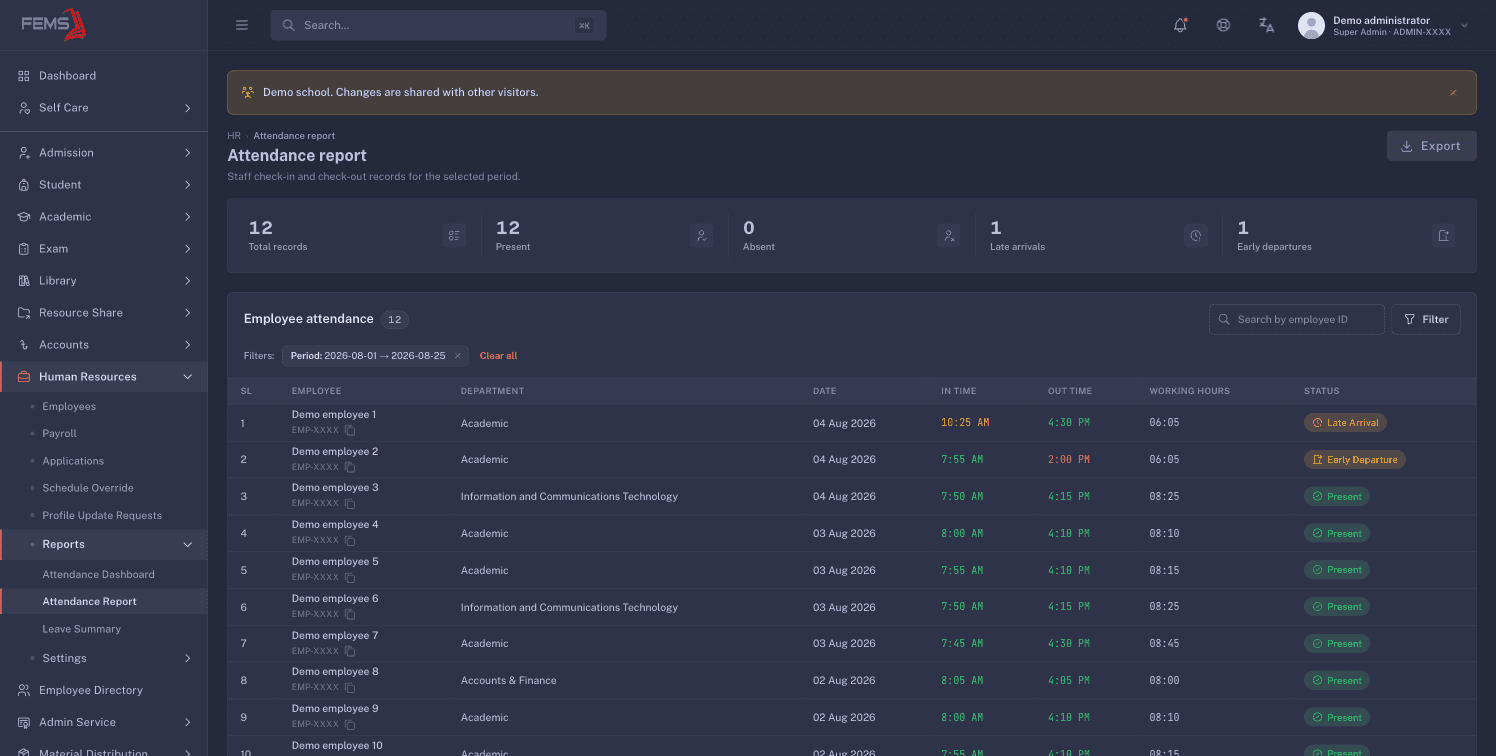
| Card | What it counts |
|---|---|
| Total Records | Attendance days in the range. |
| Present | Days with a punch-in. |
| Absent | Days that exist but carry no punch-in. |
| Late Arrivals | Days marked late. |
| Early Departures | Days marked with an early departure. |
Absent on this report is narrower than it sounds. It counts only days that exist with no punch-in. Somebody who never punched at all has no day, so they are not in this number and not in the table. To find people who did not show up, use the Attendance Dashboard, which works absence out from the calendar instead.
Three screens, three meanings of absent. Keep them apart:
| Screen | What absent means there |
|---|---|
| Attendance Report | A day exists with no punch-in. |
| Attendance Dashboard | Working days in the period, minus present days, minus approved leave days. Weekends, school holidays and future days are not working days. Day-off overrides created on the current Schedule Override screen are not picked up here (see #2468), so staff still show as absent on a holiday you entered there. See Setting holidays and extra working days. |
| Payroll | The same calendar-based idea as the dashboard, and this is the one that becomes money. See Running payroll. |
Columns
| Column | What it shows |
|---|---|
| # | Running serial number across pages. |
| EMPLOYEE | Name, then the employee ID with a copy button. |
| DEPARTMENT | Department name, or N/A. |
| DATE | The date with the day name under it. |
| IN TIME | The first punch. Shown in amber when the arrival is late. |
| OUT TIME | The last punch. Shown in red when the exit is early. |
| WORKING HOURS | The gap between the two punches. |
| STATUS | One of the five values below. |
The STATUS column has exactly five values: Present, Late Arrival, Early Departure, Late & Early Departure, and Absent. There is no half-day status in staff attendance, and holidays and leave days do not appear as statuses here.
The report does not show how many minutes late somebody was. That number is visible to the employee on their own attendance application form in Self Care.
Empty state: No attendance data available, with Try adjusting your filters or date range.
The footer reads Showing 1 to 10 of 240 entries with an Items per page: selector offering 5, 10, 15, 25 and 50. The default is 10.
Export
Export downloads a CSV of the whole filtered result, not just the page on screen, named for today's date, for example attendance_report_2026-08-10.csv. Its columns are the serial number, employee name, employee ID, department, date, in time, out time, working hours and status.
If the download fails you get a plain browser alert reading Export failed. Could not fetch data. Click Export again, and if it keeps failing, narrow the date range.
There is no print button and no PDF on this report. Export the CSV and print from your spreadsheet program.
Leave Summary
Go to Human Resources > Reports > Leave Summary. It answers "how much leave has each person used, and how much is left".
Filters
- Year picks the academic session the balances belong to, such as 2025-2026. It fills itself with the first session in the list and reloads whenever you change it.
- Search Employee takes a name or an employee ID. Press Enter or click Search.
Those are the only two controls. There is no department or campus filter on this screen.
The four summary cards
| Card | What it counts |
|---|---|
| Total Employees | Employees with a leave allocation in the selected year. It does not narrow when you search for one person. |
| Leave Types | Active leave types set up for your school. |
| Pending Requests | Leave applications waiting for a decision. |
| Approved This Month | Leave applications approved during the current calendar month. |
Approved This Month always means the real current month. It ignores the Year filter, so it does not change when you look at an earlier session.
Columns
The table is headed Employee Leave Summary - 2025-2026 for the year you picked.
The first three columns are SL, Employee (name plus the employee ID with a copy button) and Department. Every column after that is one leave type, headed with the leave type's own name, for example Casual Leave.
Each leave type cell holds two chips: an amber Used: 2 and a green Remaining: 8.
Entitlement, taken and balance
Three numbers matter per person, per leave type, and this table shows two of them.
| Number | Where it comes from | Shown here? |
|---|---|---|
| Entitlement | The days allocated to that employee for that leave type in the selected year | No |
| Taken | Days used from approved leave applications | Yes, as Used: |
| Balance | Entitlement minus taken | Yes, as Remaining: |
So a cell reading Used: 2 and Remaining: 8 means the person was entitled to 10 days. Add the two chips to recover the entitlement, because the table never prints it.
Two warnings on these numbers:
- Balance is not floored at zero. Someone who has taken more than they were allocated shows a negative Remaining, for example
Remaining: -1. Treat any negative as an over-consumed type to investigate, not as a display glitch. - Both chips read
0when the employee has no allocation for that type. That is not the same as "used everything". It means nothing was allocated. Check the employee's leave allocation before you refuse a request on the strength of a0.
The leave-type columns come from the first allocation FEMS finds for the selected year, not from your school's full leave-type list. If different groups of staff carry different leave types, the columns follow whichever group came first, so a type that some people hold may have no column at all.
The Export button on this screen shows a success message and does not produce a file (see #2472). Copy the figures you need from the screen for now, and use the balances shown on each individual leave application when you are deciding one.
Late arrival and early departure
These two marks are the ones that reach payroll, so they are worth understanding exactly.
How a late mark is made
A day is marked late when the first punch of the day is after the employee's scheduled start time for that weekday, taken from their timetable. Two conditions stop it:
- No punch at all, so there is no day and no late mark.
- No scheduled start time on their timetable for that weekday, so nothing to be late against.
A day is marked early departure when the last punch is before the scheduled end time. This one has no allowance at all, by design. Leaving one minute early is an early departure.
On a Day Off override, both marks are suppressed. Somebody who comes in on a declared day off has their punches recorded and cannot be marked late or early for it.
The grace window
When a punch is applied as it arrives, no grace is allowed. A punch one minute after the scheduled start is late. A later recalculation after a timetable or override change can apply an institution or employee grace value instead. There is no FEMS screen where an HR admin can view or change that value.
Approving a mark stops the deduction
This is the money side, and it is the reason the attendance application workflow exists.
Payroll counts only unapproved marks. A late mark that has been approved is skipped when the deduction is worked out, and the same holds for an approved early departure. So approving an employee's Late Arrival application is what protects their pay.
The deduction itself is a whole-day one. With the school's late arrival setting at 3, every 3 unapproved late marks in the period cost 1 day's pay, and 5 late marks still cost 1 day because the remainder is dropped. If the school has never set that number, no late deduction is taken at all. The full calculation, including absent days and unpaid leave, is on Running payroll.
Decide the applications before you run the month. Once the payslips are generated, the marks that were still unapproved have already been charged.
FAQ
A member of staff was at work but shows as absent. What do I check first? Check the Attendance Device UID field on their employee record first. On a school whose device software pushes punches into FEMS, that field is what ties their card, fingerprint or face ID to their record, and an empty or wrong value loses every punch. On a school where FEMS reads the device software's own database instead, check that the ID number programmed on the device matches the employee ID on their FEMS record. Either way, also check that their employment record is active for that date. Every day since the mismatch is missing.
Can I enter attendance for somebody by hand? No. There is no screen in FEMS for typing in a staff member's punches. The employee files a Manual Attendance application from Self Care, their reporting manager recommends it, and the approver approves it.
Why does somebody appear on the dashboard as absent but not on the Attendance Report at all? The two screens count differently. The report lists days that exist, and a person who never punched has no day to list. The dashboard works out from the calendar which days were working days and calls the missing ones absent.
Why do the six figures on the dashboard not add up to Employees Selected? One person can be in two of them at once, for example present today and an early departure. People on a weekend or a school holiday are in none of them. The six figures also ignore the Status (today) filter, so they describe your whole selection while the table below is narrowed.
Why is the Designation filter greyed out? Pick a Department first. Designations are listed per department, so the filter stays disabled until FEMS knows which department to list.
Working Hours looks too high for someone who left at lunch and came back. FEMS keeps only the first and last punch of the day. Working Hours is the gap between them, so any time away in the middle is inside that figure. There is no break tracking.