Setting up routes, vehicles, and drivers
Add bus routes, fleet records, drivers, and the allocations that connect them.
Transport settings hold the records your school needs before it can assign transport to a student or employee. Set up the route, vehicle, and driver first. Then connect the three with a route allocation.
Prerequisites
You need access to Transport > Settings, usually held by a transport administrator. Drivers must already have employee records.
Open Transport settings
In the sidebar, open Transport, then Settings.
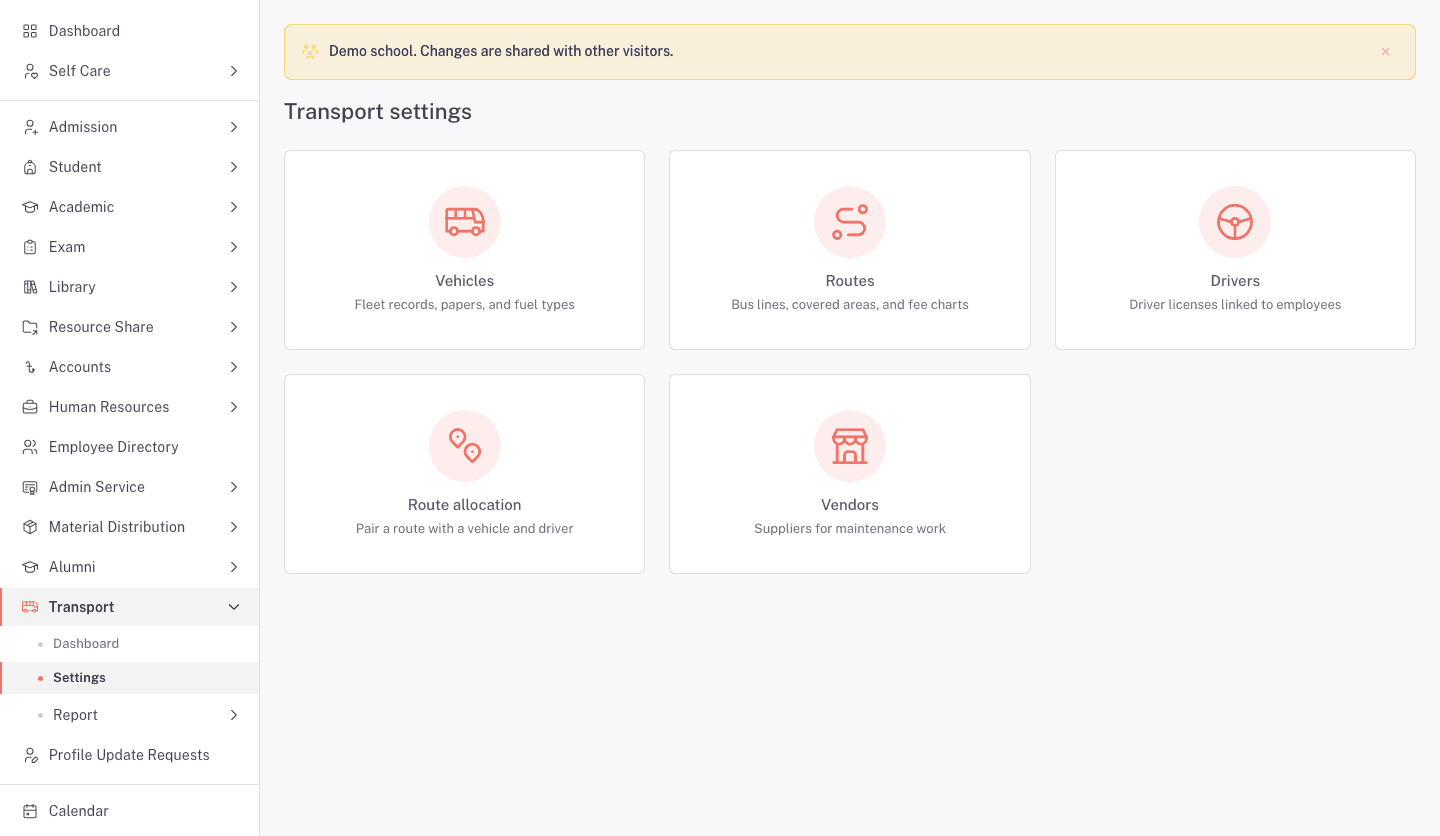
The settings page has separate areas for Vehicles, Routes, Drivers, Route allocation, and Vendors.
1. Add a route
Open Routes, then click Add route.
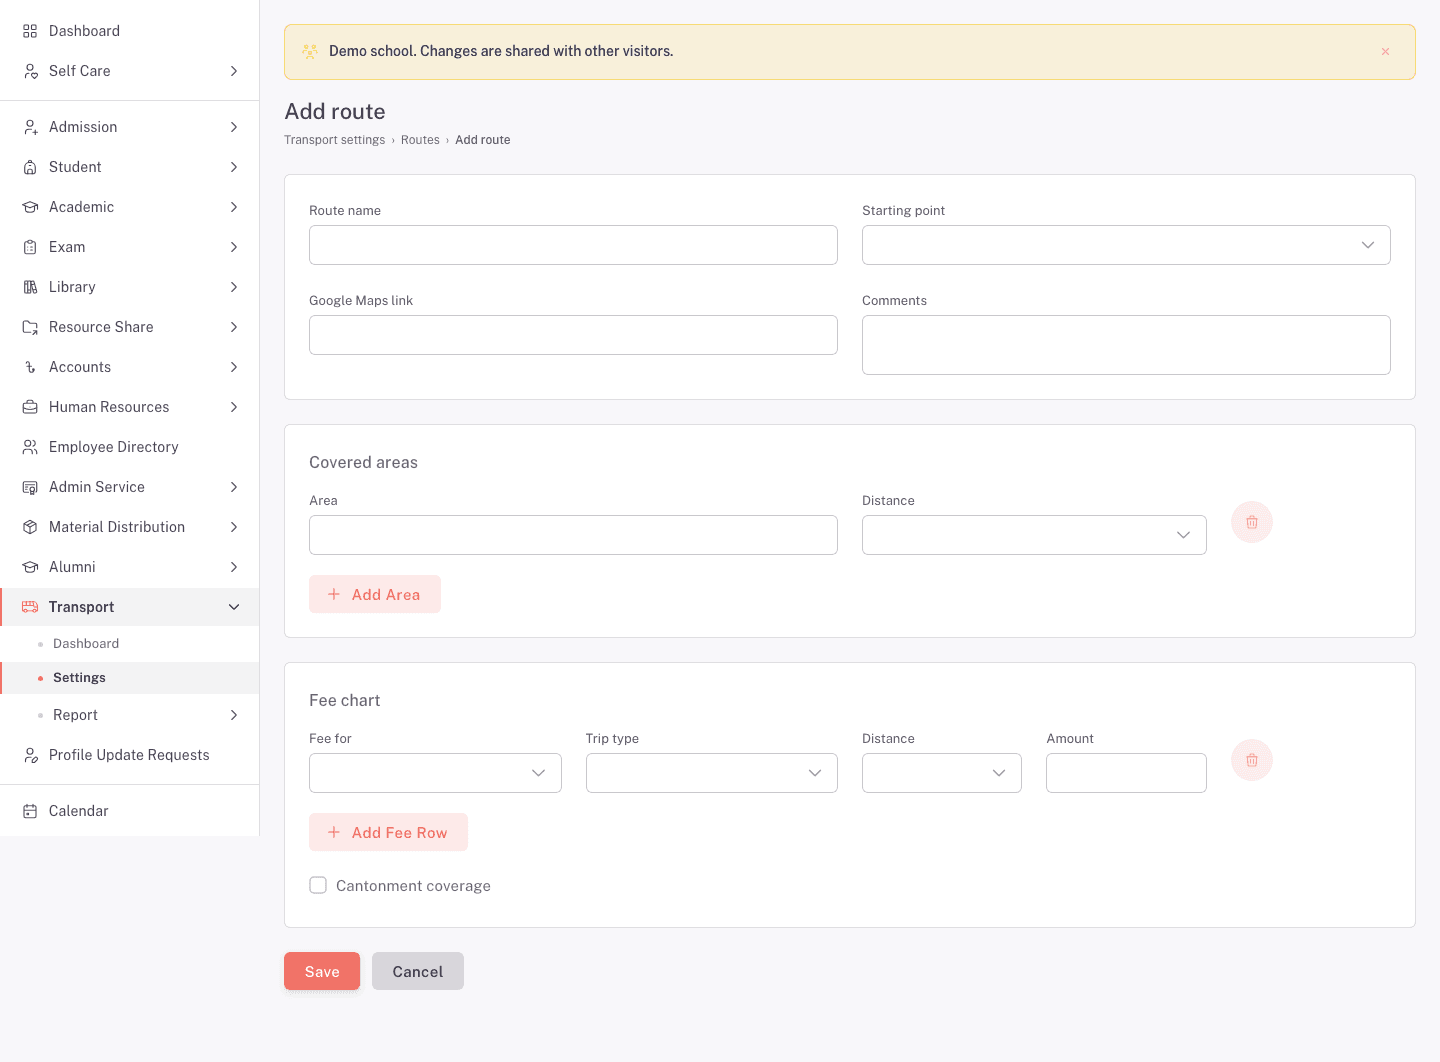
- Enter the Route name.
- Choose the Starting point.
- Add a Google Maps link or Comments when they help transport administrators identify the route.
- Under Covered areas, enter each Area and its Distance. Click Add Area for another stop.
- Under Fee chart, choose what the fee is for, the Trip type, distance, and Amount. Click Add Fee Row when the route needs another fee.
- Turn on Cantonment coverage only when it applies to the route.
- Click Save.
2. Add a vehicle
Return to Transport settings, open Vehicles, then click Add vehicle.
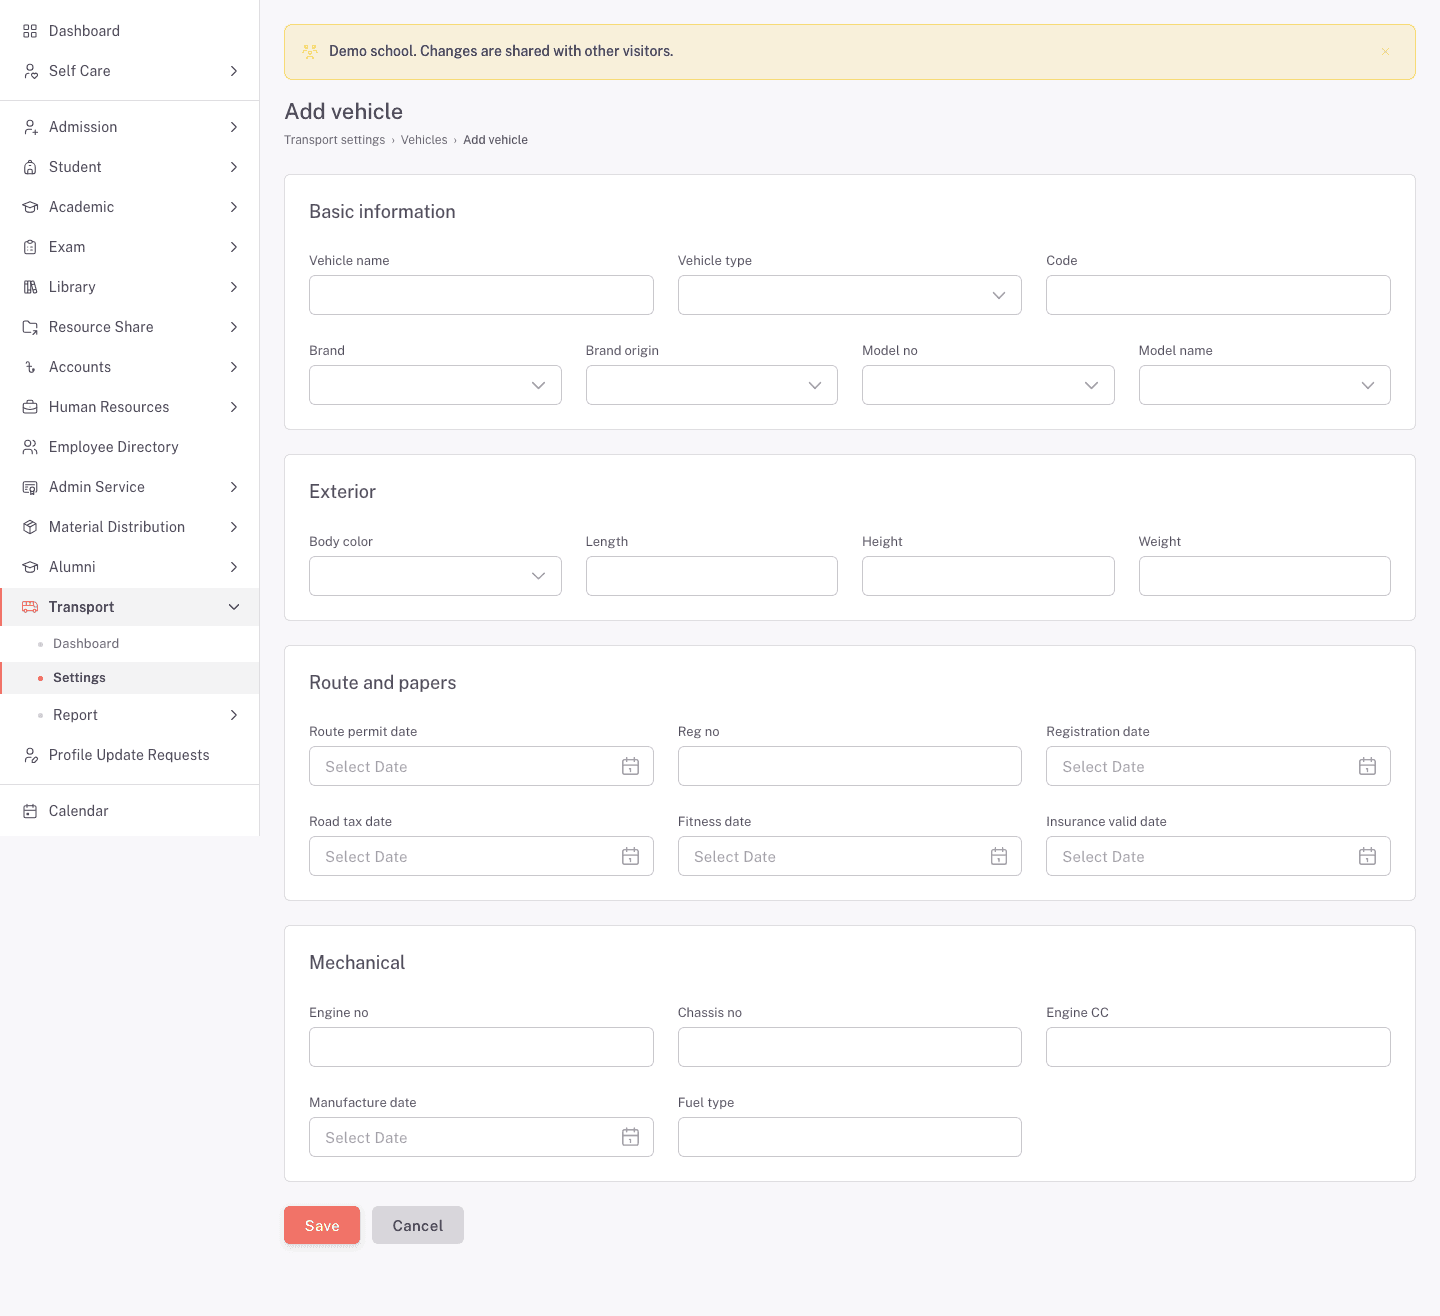
Fill in the vehicle's Basic information first. The form also groups its dimensions under Exterior, permit and registration dates under Route and papers, and engine details under Mechanical. Click Save when the fleet record is complete.
Use the dates from the vehicle's real papers. These details help transport administrators keep the correct vehicle record up to date.
3. Add a driver
Return to Transport settings, open Drivers, then click Add driver.
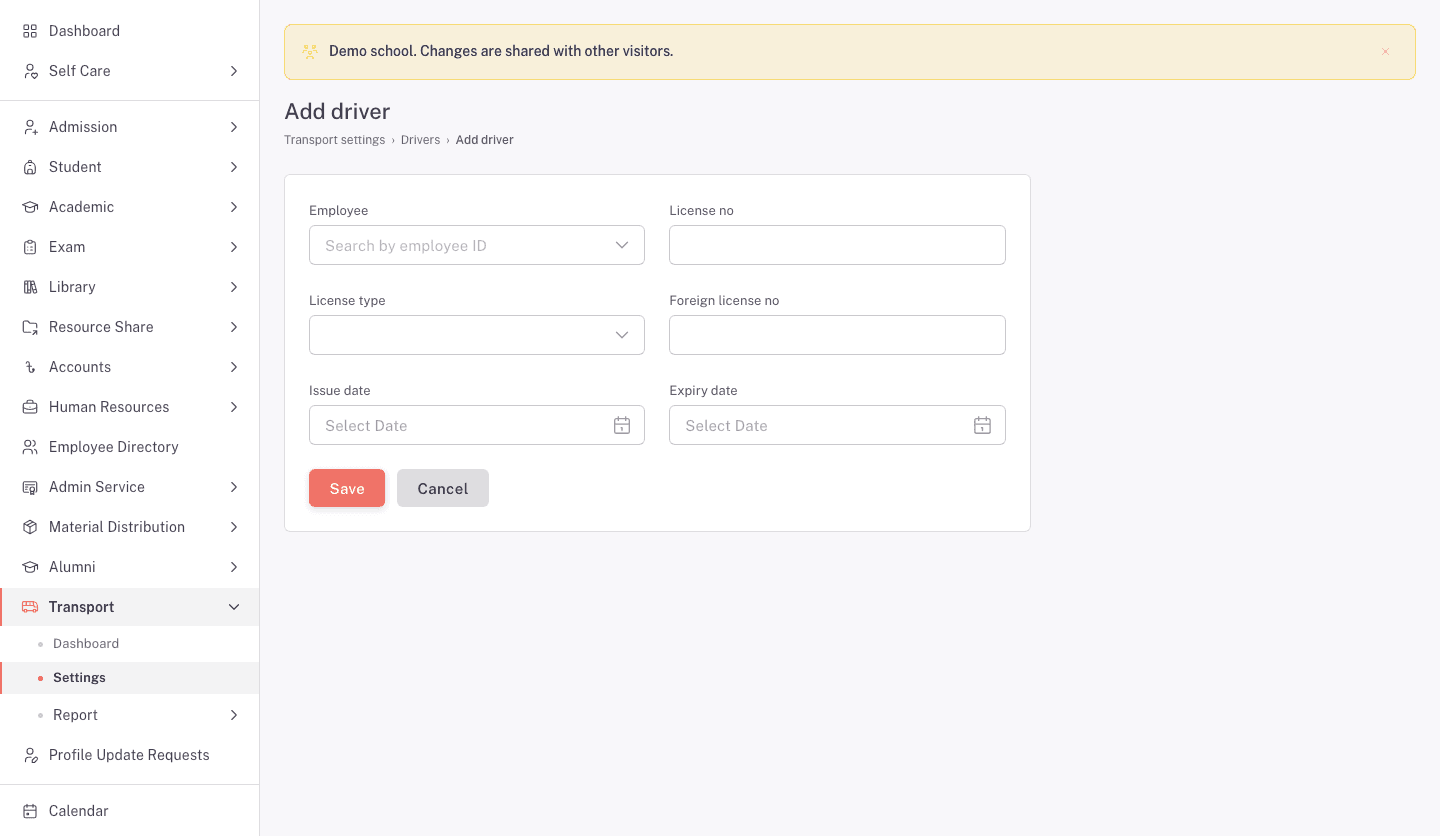
- Choose the Employee by employee ID.
- Enter the License no and License type.
- Add a Foreign license no only when the driver has one.
- Set the Issue date and Expiry date.
- Click Save.
The driver record links to an existing employee, so the employee needs to exist before this step.
4. Pair the route, vehicle, and driver
Return to Transport settings, open Route allocation, then click Add allocation.
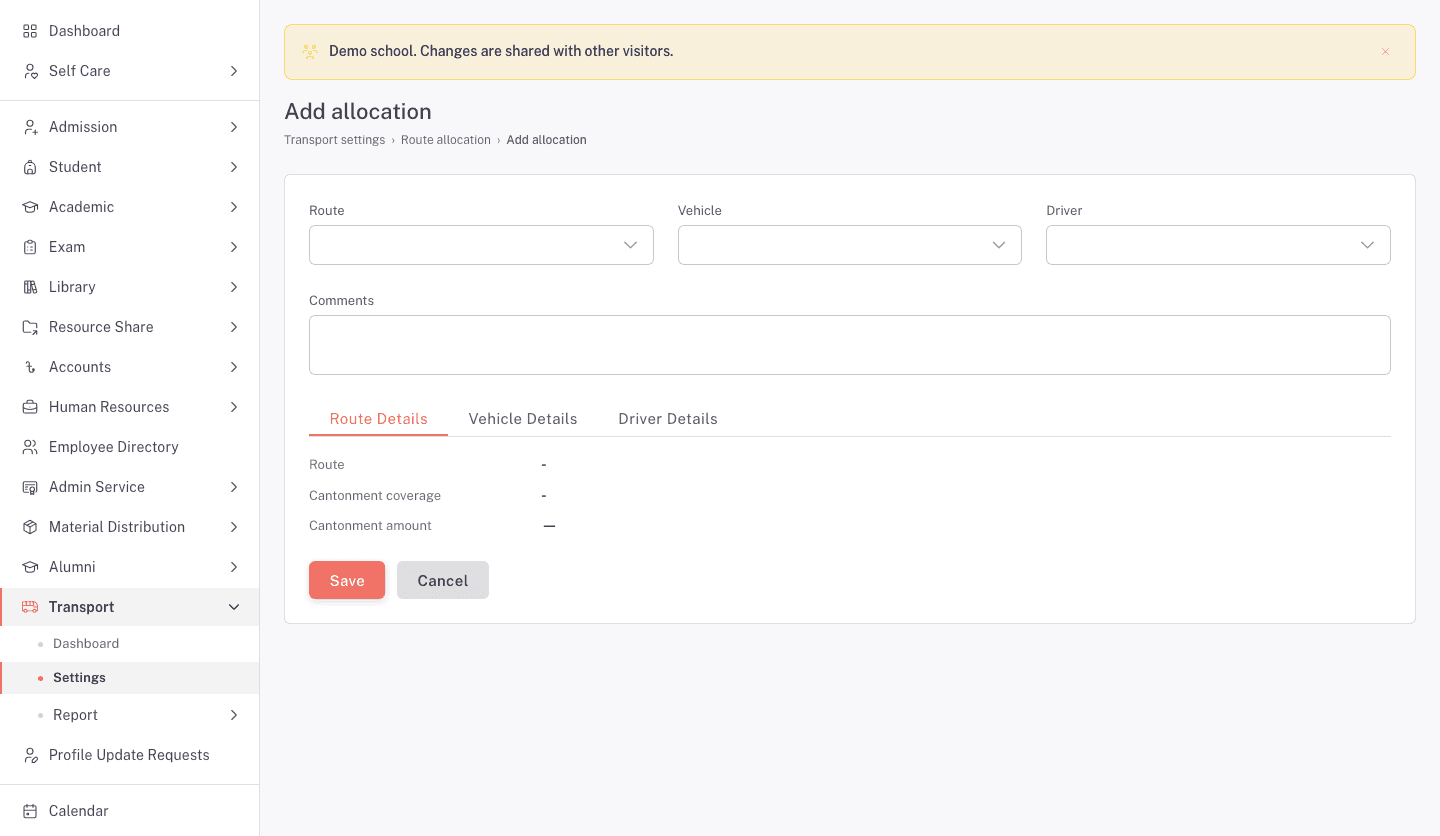
Choose the Route, Vehicle, and Driver. Add Comments when another transport administrator needs context, then click Save.
5. Add a maintenance vendor
Return to Transport settings, open Vendors, then click Add vendor.
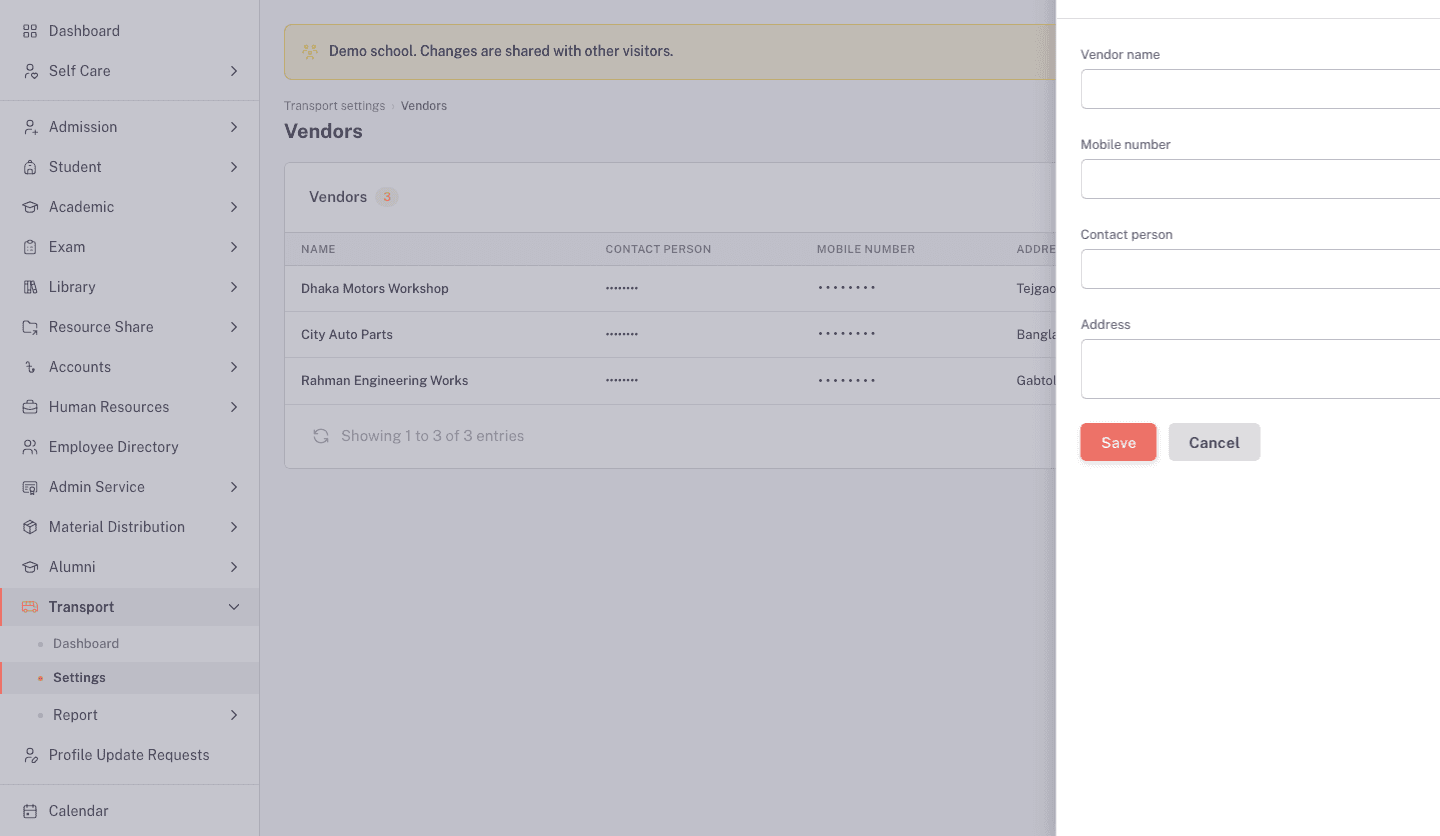
Enter the Vendor name, Mobile number, Contact person, and Address. Click Save. The maintenance form uses this list when outside work is recorded against a vehicle.
FAQ
Why does the driver field use an employee record? Drivers are employees in FEMS. Add the employee first, then create the driver record with their licence details.
Can one route have several covered areas? Yes. Use Add Area for each stop or area covered by the route.
What is the difference between a route and a route allocation? A route defines the bus line, covered areas, and fees. A route allocation pairs that route with a vehicle and driver.
Where do I add a workshop or parts supplier? Open Vendors in Transport settings. Add its contact details before recording vendor work in Vehicle Management.
Where do I put a student on the route? Use Assigning students or employees to a route.