Sending an SMS
Walk the four-step Send wizard: pick an audience, write the message (templates + variables), choose recipients, then send or schedule.
The Send screen is a four-step wizard: pick who you're texting, write the message, choose recipients, then review and submit. This page walks through all four steps.
Prerequisites
You need send access, or an admin role. Whatever you submit goes through proof-read and approval before it reaches any phone. See How SMS works in FEMS for the full pipeline.
Step 1: Audience
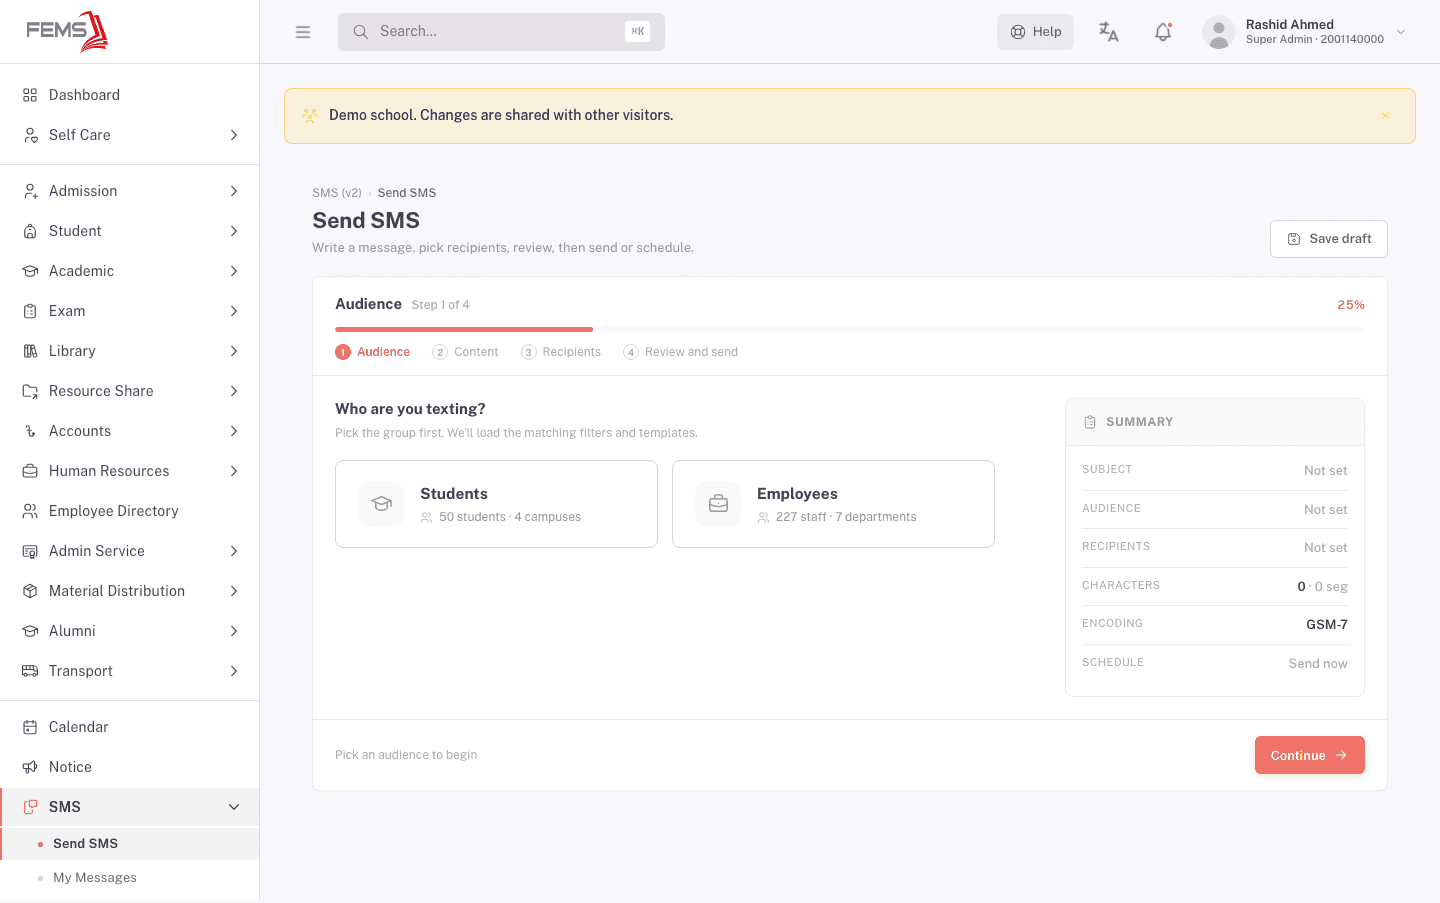
Open SMS > Send SMS. Pick Students or Employees. Each card shows a live count, for example "50 students · 4 campuses". Your choice controls which templates and variables are available in the next step, so pick it first.
Step 2: Content
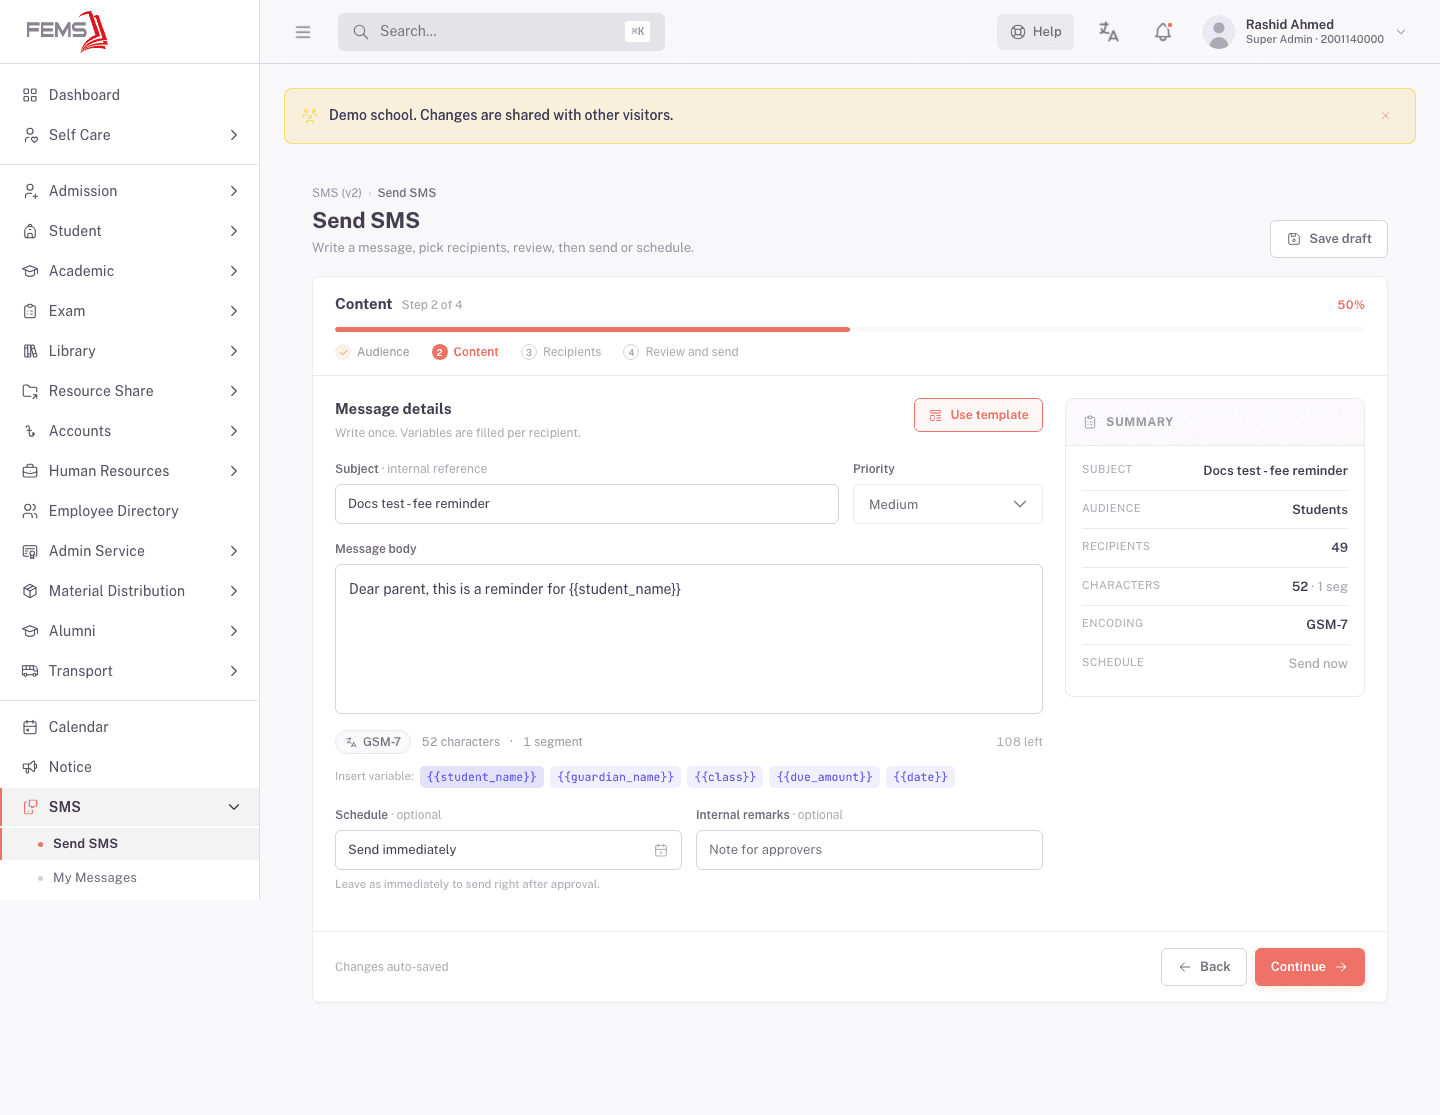
Write your message, or click Use template to start from a saved one.
- Subject is for your own reference. Recipients don't see it.
- Priority defaults to Medium.
- Message body: write your text, or use the Insert variable chips (for example
{{student_name}},{{guardian_name}},{{class}}) to personalise per recipient at send time. - Watch the counter under the message box. It shows the character count, the encoding (GSM-7 or Unicode), and the segment count. Long messages, and any Bangla or other Unicode text, split into more segments, and each segment is billed separately.
- Schedule is optional. Leave it as Send immediately to send right after approval, or pick a future date and time.
- Internal remarks are optional notes for your proof-reader and approver. Recipients don't see them.
Using a template
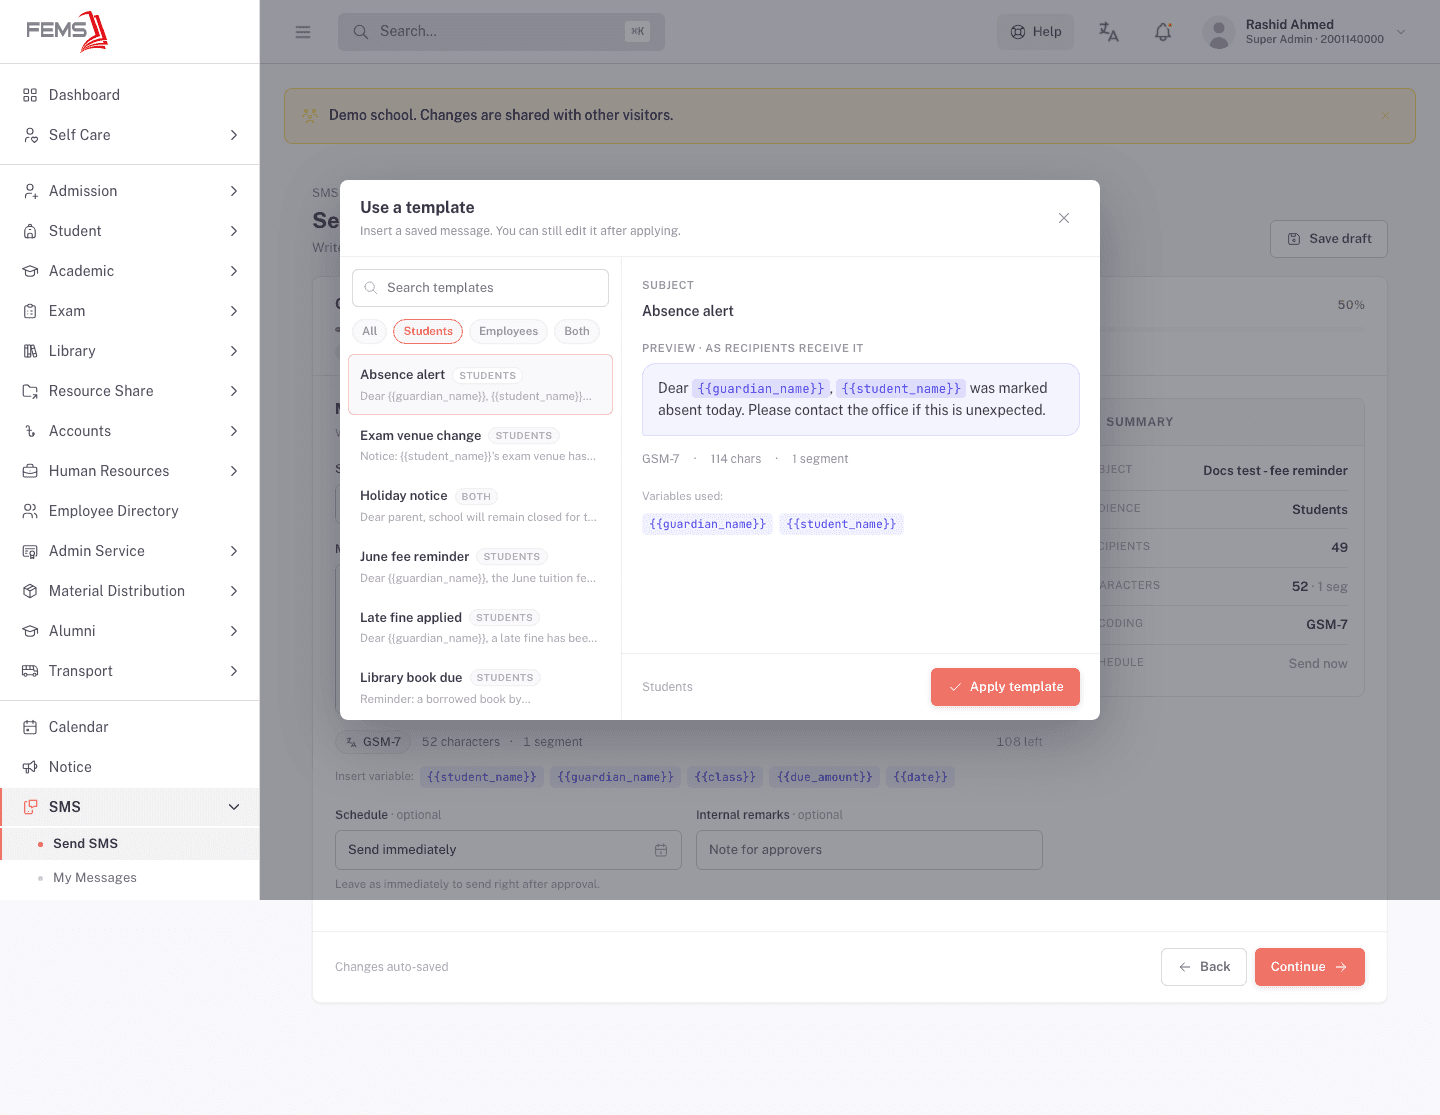
Click Use template to open the picker. Filter by audience, pick a template, and its preview shows exactly what recipients will receive, with its character count, encoding, and segment count. Click Apply template to load it into the composer. You can still edit it afterward.
Step 3: Recipients
Switch between two tabs:
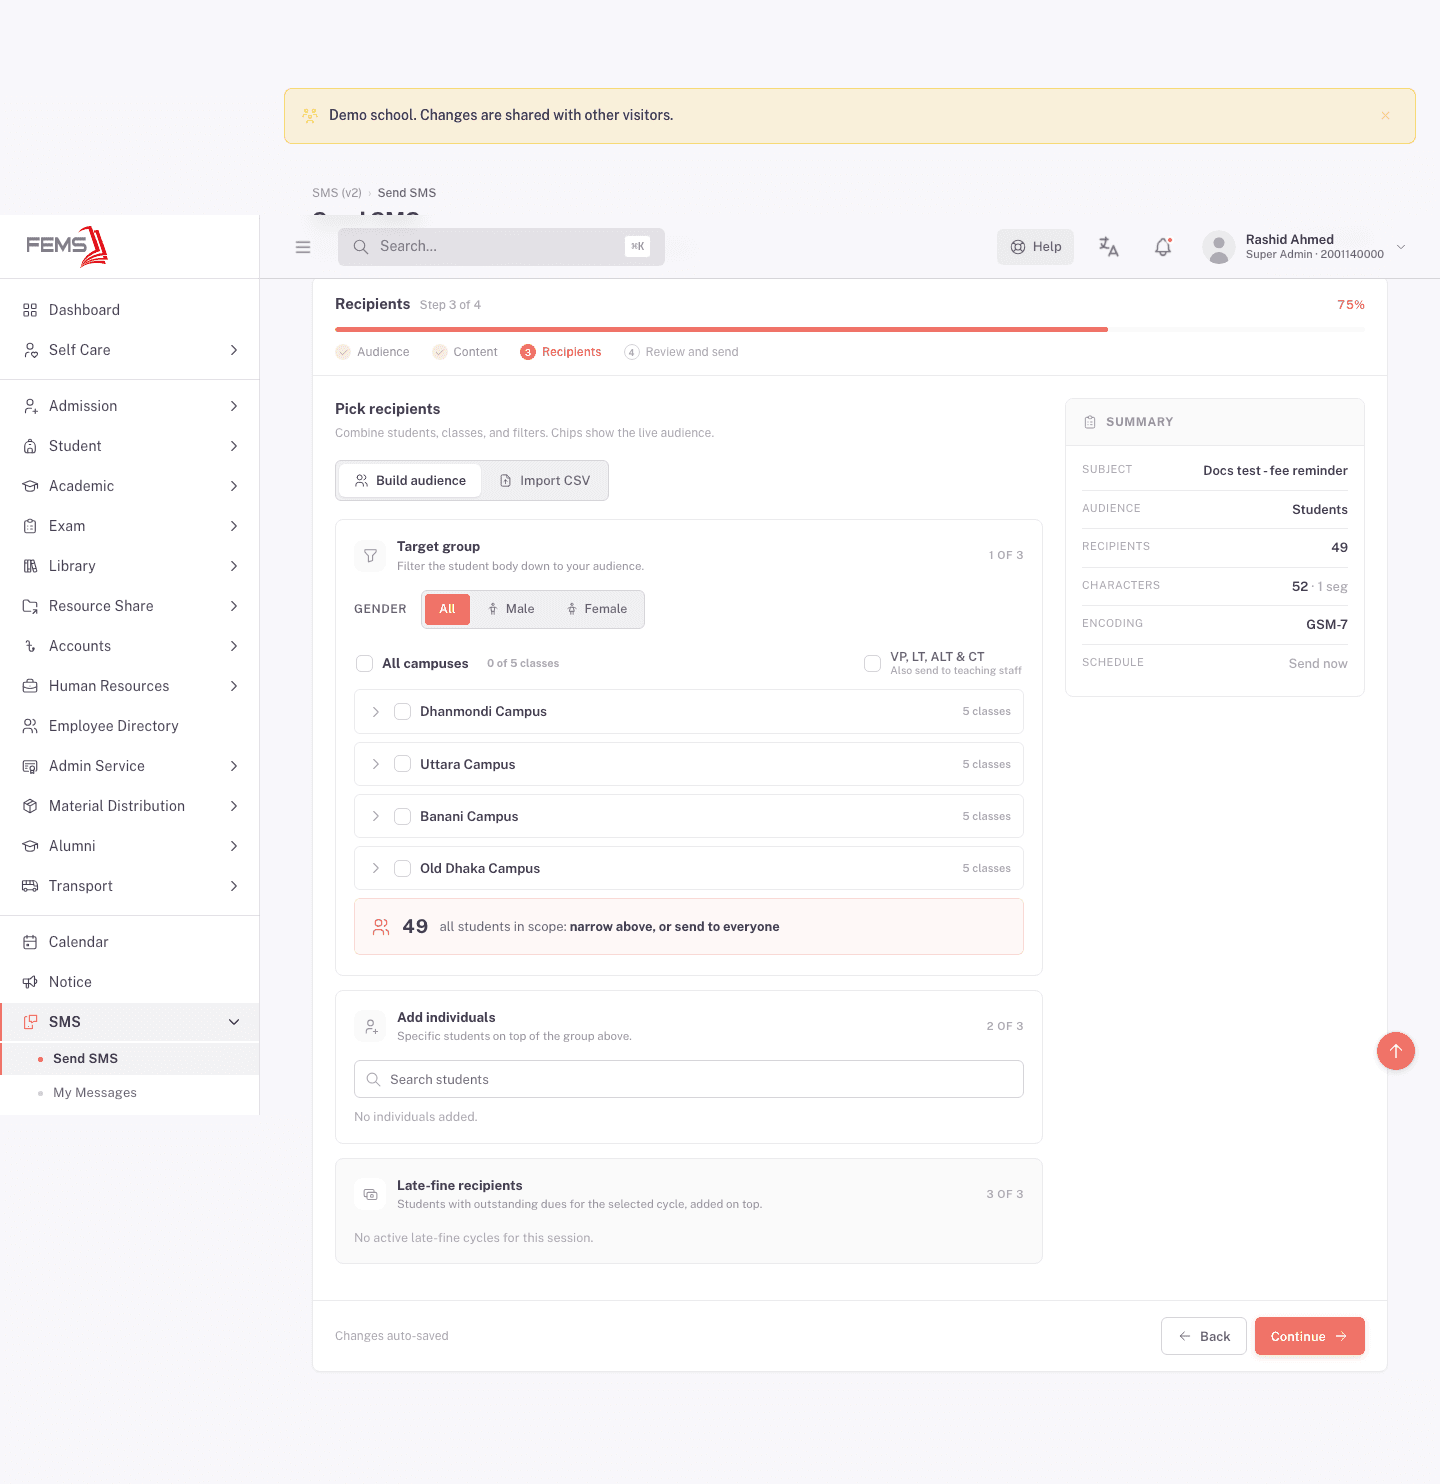
- Build audience: under Target group, filter by Gender, then tick one or more campuses to pull in their classes (or tick All campuses). A VP, LT, ALT & CT toggle adds teaching staff on top. Under Add individuals, add specific students on top of that group. If your school runs fee reminders, Late-fine recipients adds students with outstanding dues for the current cycle. The recipient count updates live as you narrow the group.
- Import CSV: upload a CSV of name and phone pairs instead. Click Download template for the exact format. Headers are optional (FEMS reads each row as name, then phone), the limit is 5000 rows or 1 MB per file, and FEMS adds back a leading zero if Excel stripped it from a mobile number.
Step 4: Review and send
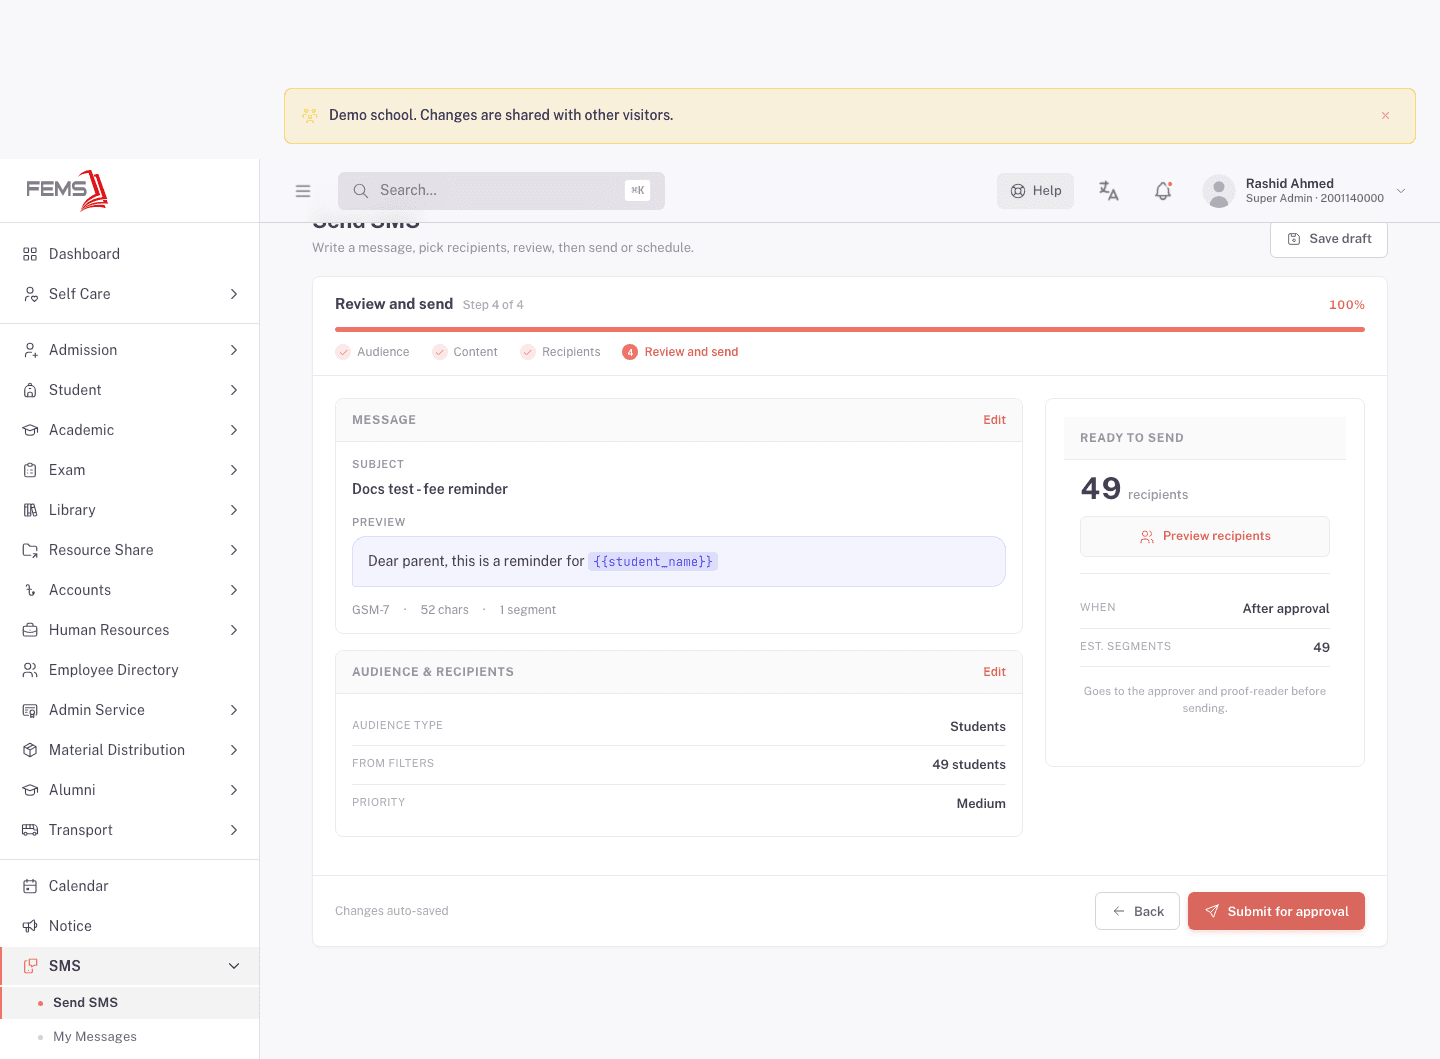
The final step is read-only. It shows your message exactly as recipients will receive it, plus the audience, recipient count, and priority you set earlier. Click Edit on either card to go back and change something.
If you need to change the schedule, go back to Step 2. Review and send doesn't have its own send-now or schedule choice, it only summarizes what you already set there.
Click Submit for approval when you're ready. This doesn't send the message. It queues it for your proof-reader.
Drafts
FEMS keeps your in-progress message as you move through the steps, so leaving the wizard and coming back picks up where you left off. Click Save draft at any point to save it as a real draft you can find later on My Messages, with the status Draft.
After you submit
Your message moves to Awaiting proof-read. Track it, and every later stage, on Tracking your messages.
Editing a submitted message
Open a not-yet-sent message from My Messages and click Edit. You get two options:
- Reschedule only changes the send time. Approvals stay in place.
- Edit message changes the text, audience, or recipients. FEMS warns you first: "The proof-reader and approver approved the current wording. Changing the text, audience, or recipients returns this message to Proof-read for re-approval." Confirm to reopen the composer, or back out and leave it as is.
FAQ
Why did my one message cost three SMS segments? Long messages, and any Bangla or other Unicode text, split into more segments than plain English text. Each segment is billed. Watch the counter under the message box in Step 2 to see this before you submit.
Can I send to just a few specific people instead of a whole class? Yes. Use Add individuals in Step 3 to add specific students or employees on top of, or instead of, a filtered group.
Can I schedule a message for next week? Yes, in Step 2. Pick a date and time for Schedule instead of leaving it as Send immediately.
I closed the tab halfway. Is my message gone? No. FEMS keeps your progress and picks it up when you return to Send SMS. Click Save draft if you want a saved copy you can find later on My Messages.
Why does editing my message restart the approval? Because your proof-reader and approver signed off on the exact wording, audience, and recipients you had at the time. Changing any of those means someone needs to check it again. If you only need to change the send time, use Reschedule instead. That doesn't need re-approval.