Creating and managing service requests
Create a service request for a student, edit it, and collect payment against a single request.
Once a service and its delivery modes exist, front-desk staff can raise a request for a student, track it, and collect payment for it here.
Prerequisites
You need front-desk or accounts access to reach this page. At least one service must already be set up on Configuring add-on services and payment modes before you can select one in the request form.
What you'll find on this page
This page covers finding and filtering requests, creating a request, editing a request, and viewing a request to collect payment.
Finding and filtering requests
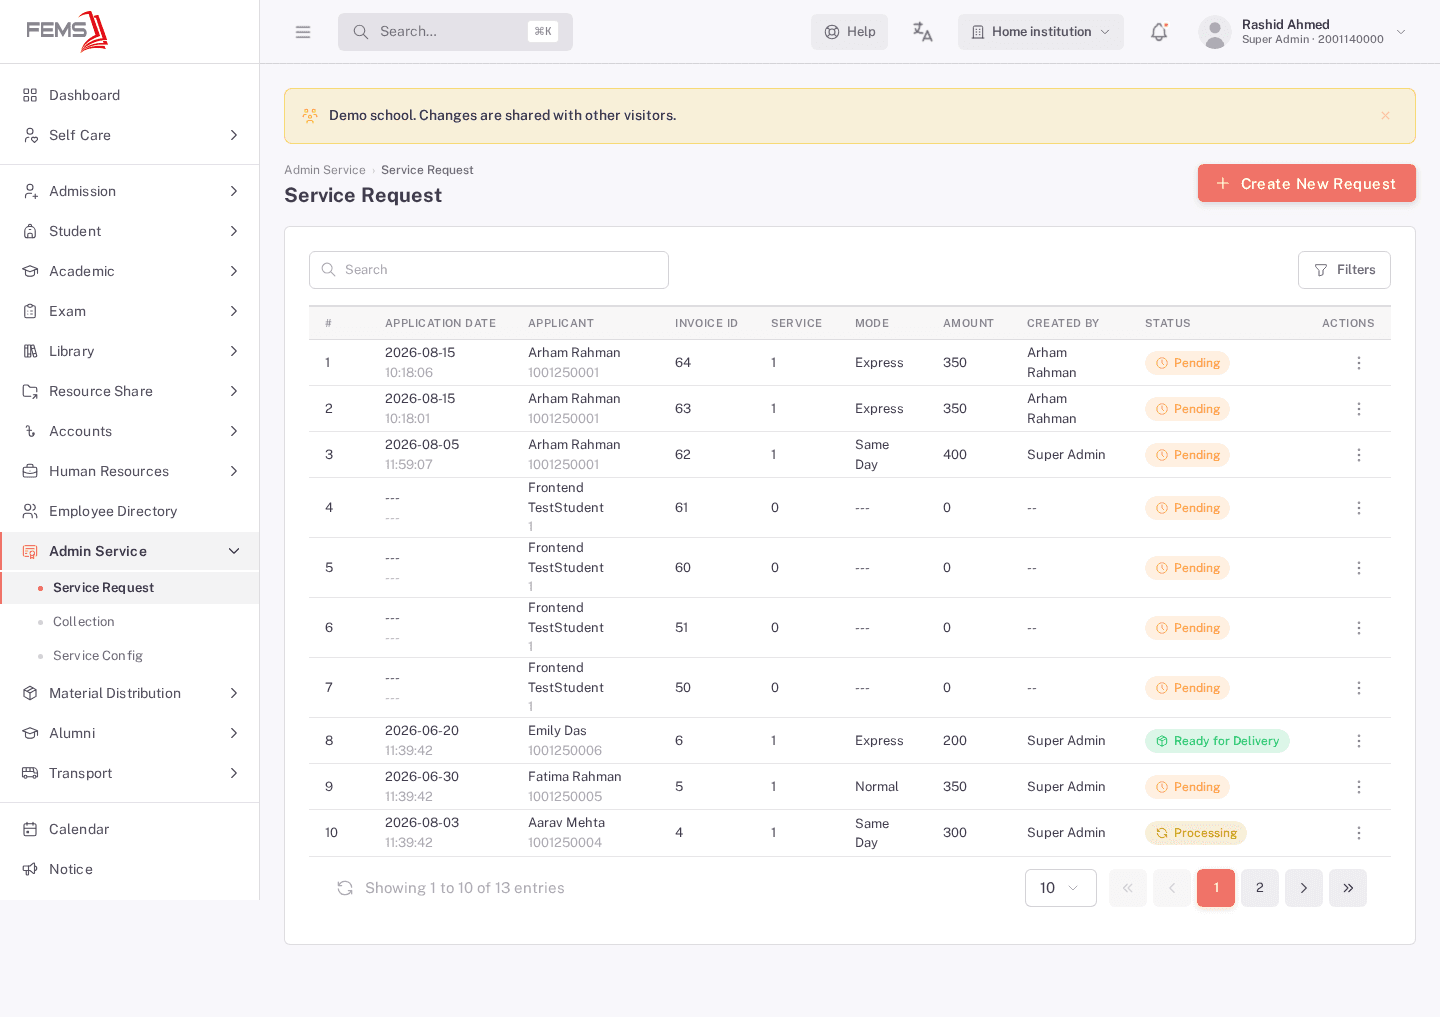
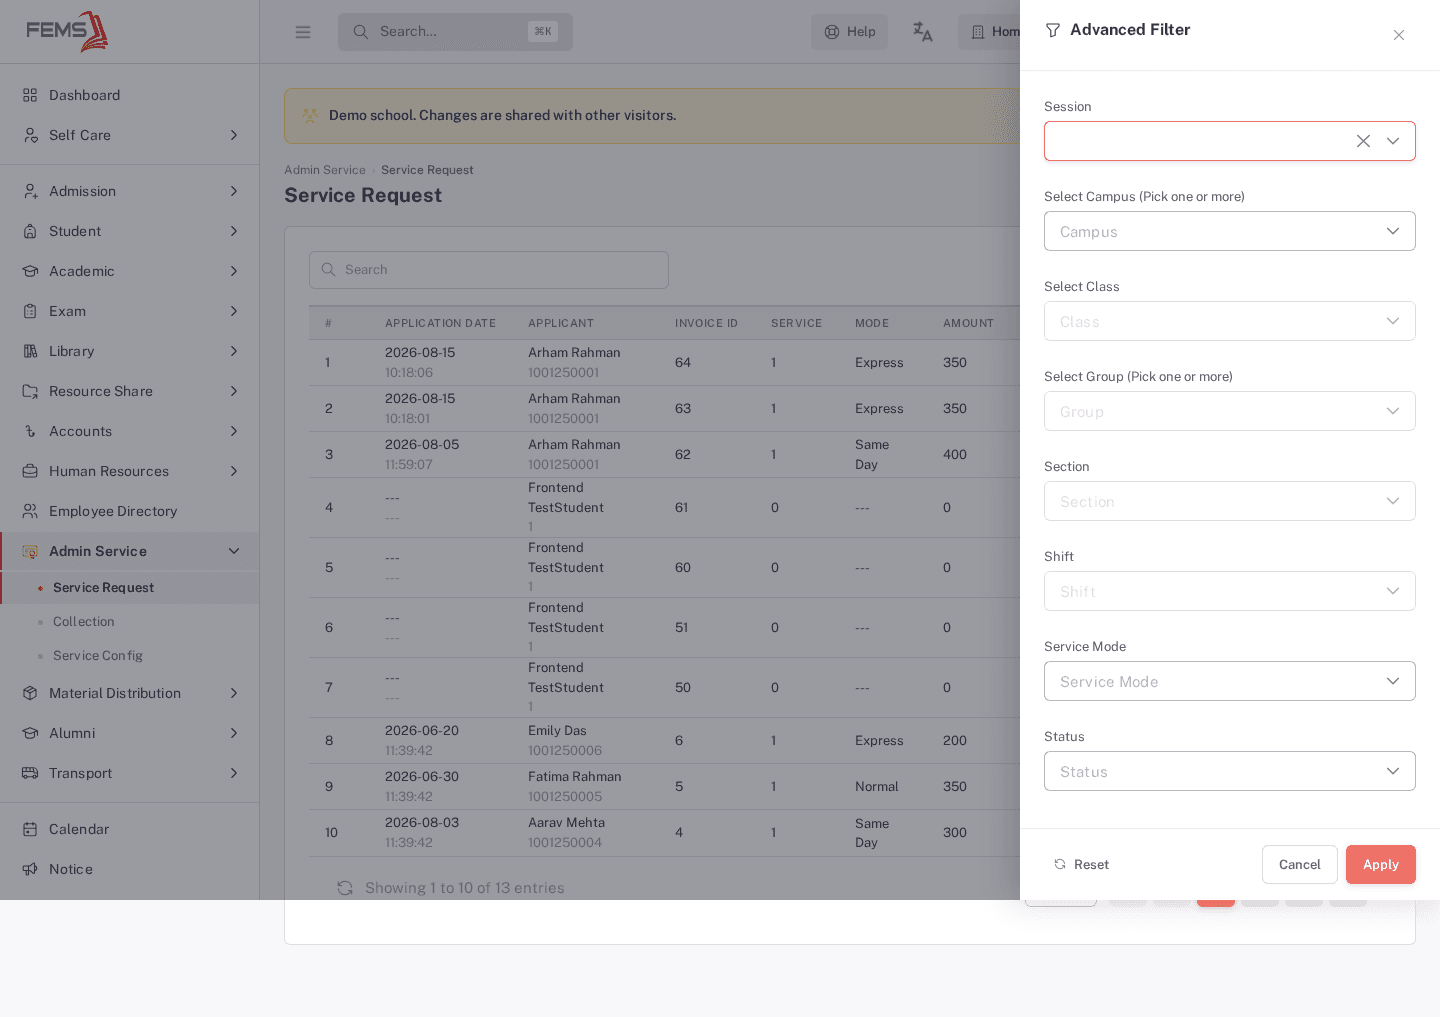
The list shows the service requests you can access, with applicant, service, mode, amount, and status. Use Filters to narrow it down by Session, Campus, Class, Group, Section, Shift, Service Mode, or Status.
Creating a request
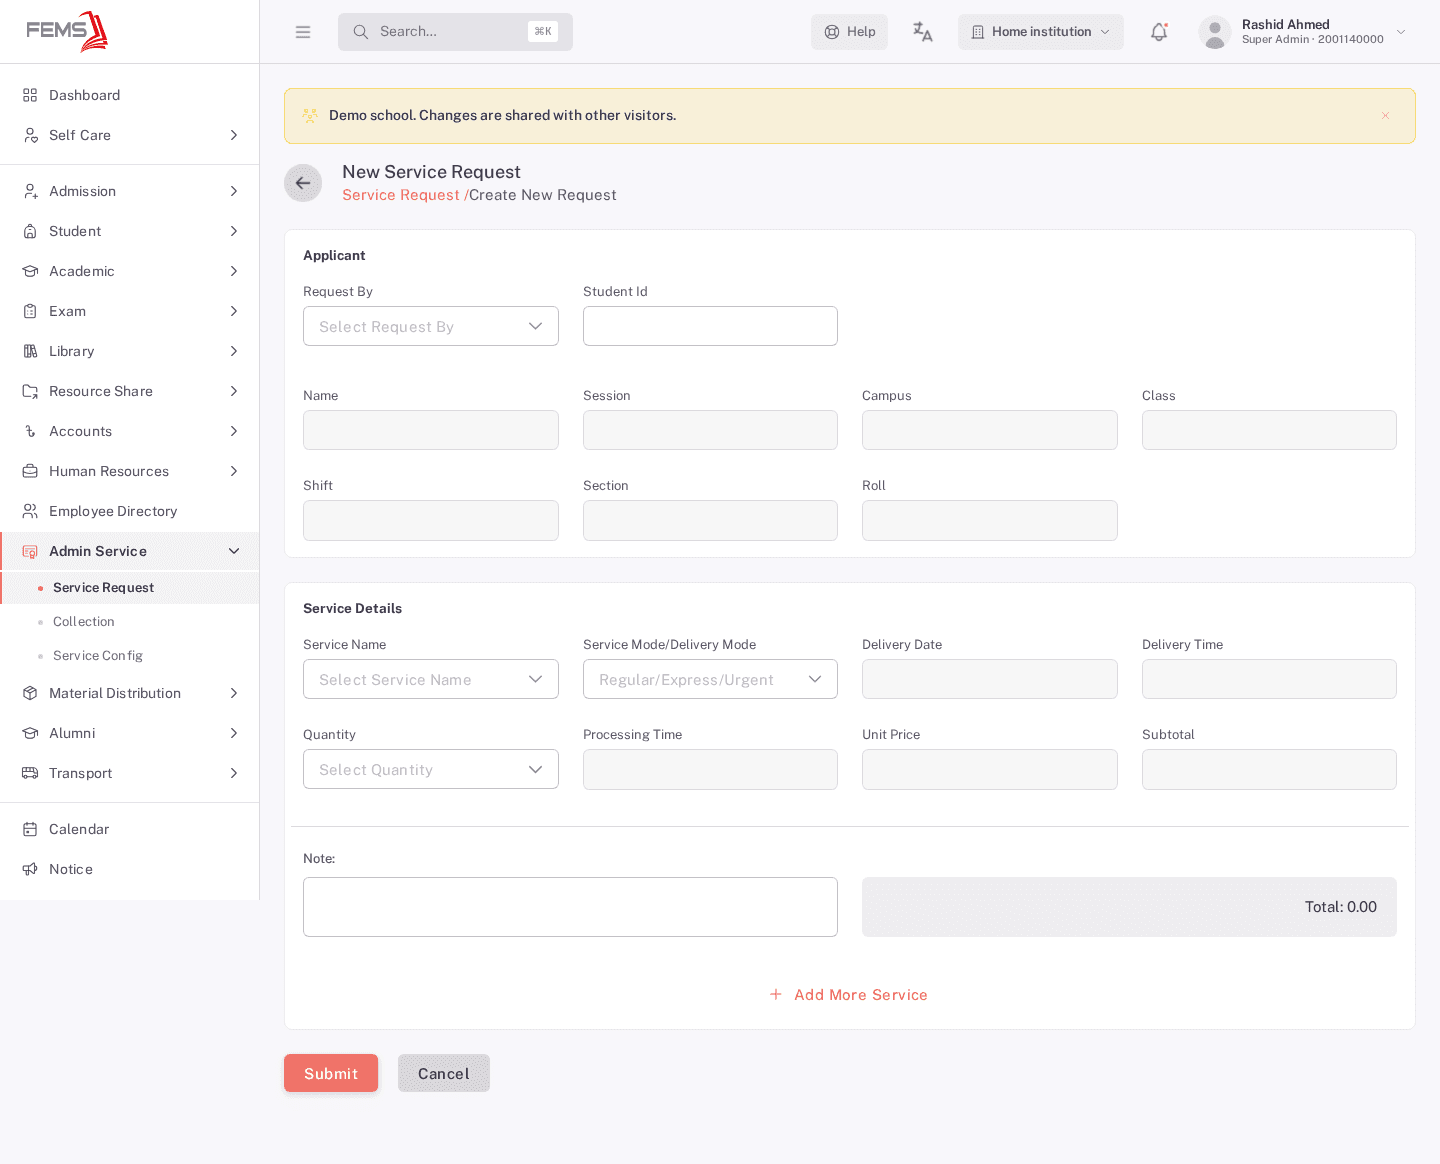
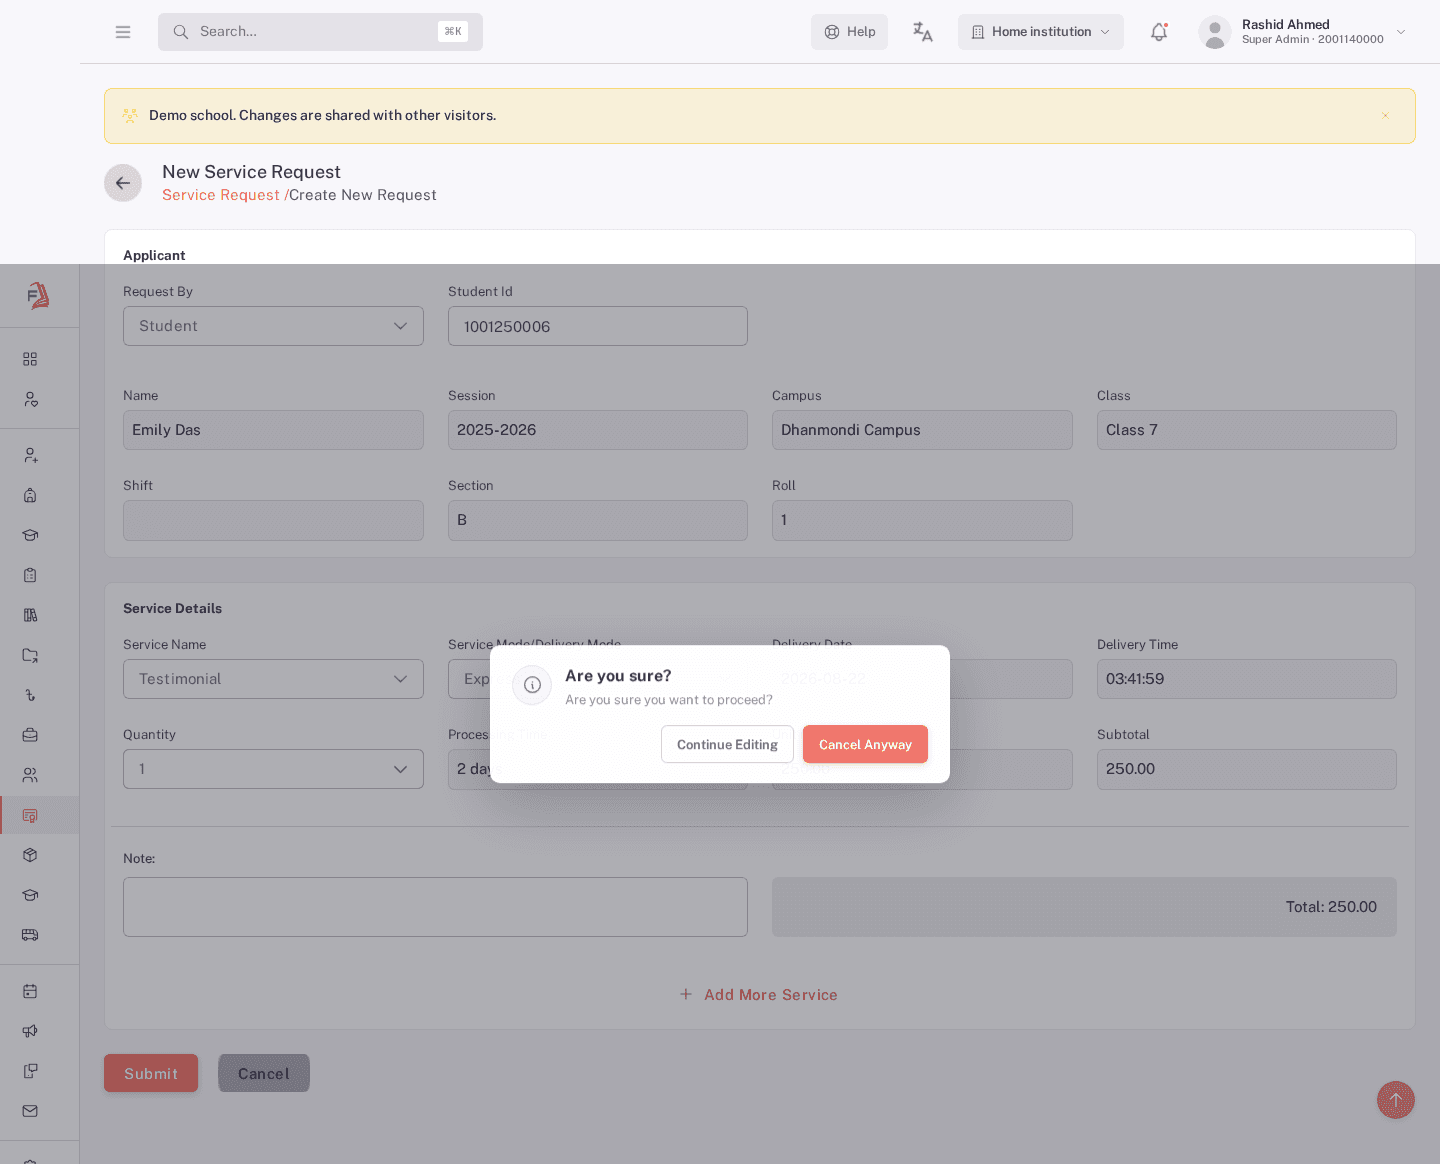
- Click Create New Request.
- Choose who the request is for under Request By: Teacher, Student, or Guardian.
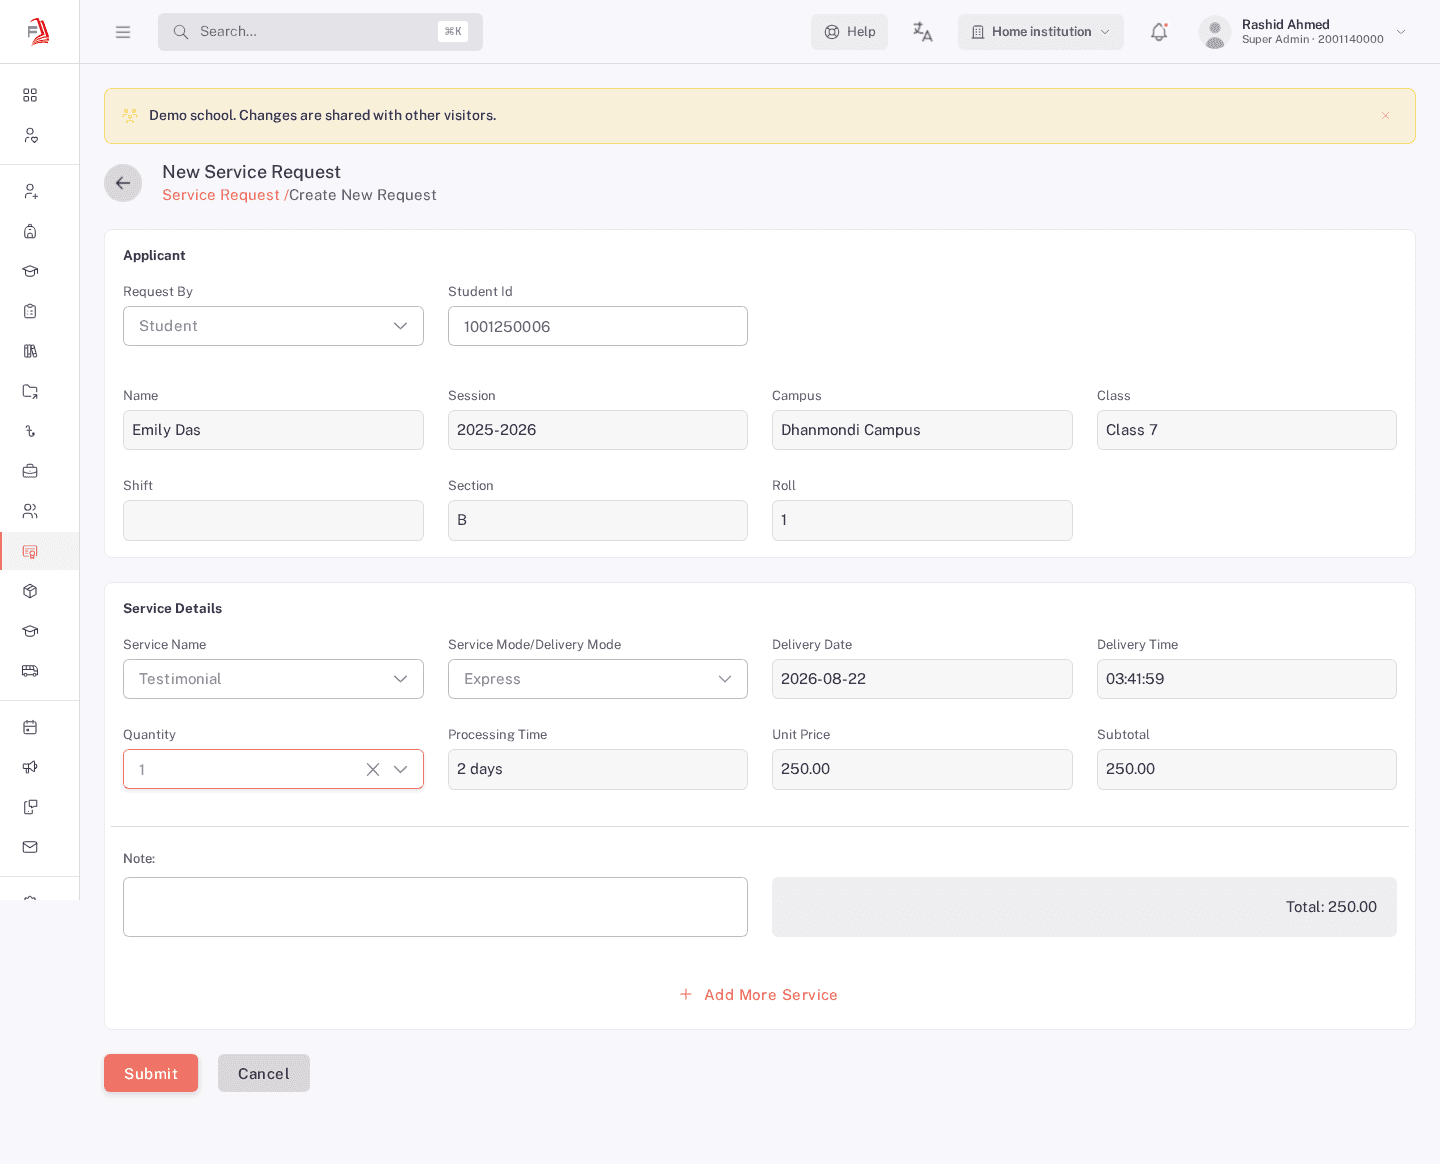
- Search for the person by ID under Student Id (the field label changes based on your Request By choice) and pick them from the suggestions. Their name, session, campus, class, shift, section, and roll fill in automatically.
- Choose a Service Name from the services set up earlier, then a Service Mode/Delivery Mode. Delivery date, delivery time, processing time, and unit price fill in automatically from the service and mode you picked.
- Choose a Quantity. The subtotal and running total update as you go.
- Click Add More Service to add another line item to the same request, if needed.
- Add an optional Note, then click Submit.
If you click Cancel after filling anything in, you're asked to confirm before your entries are discarded.
Editing a request
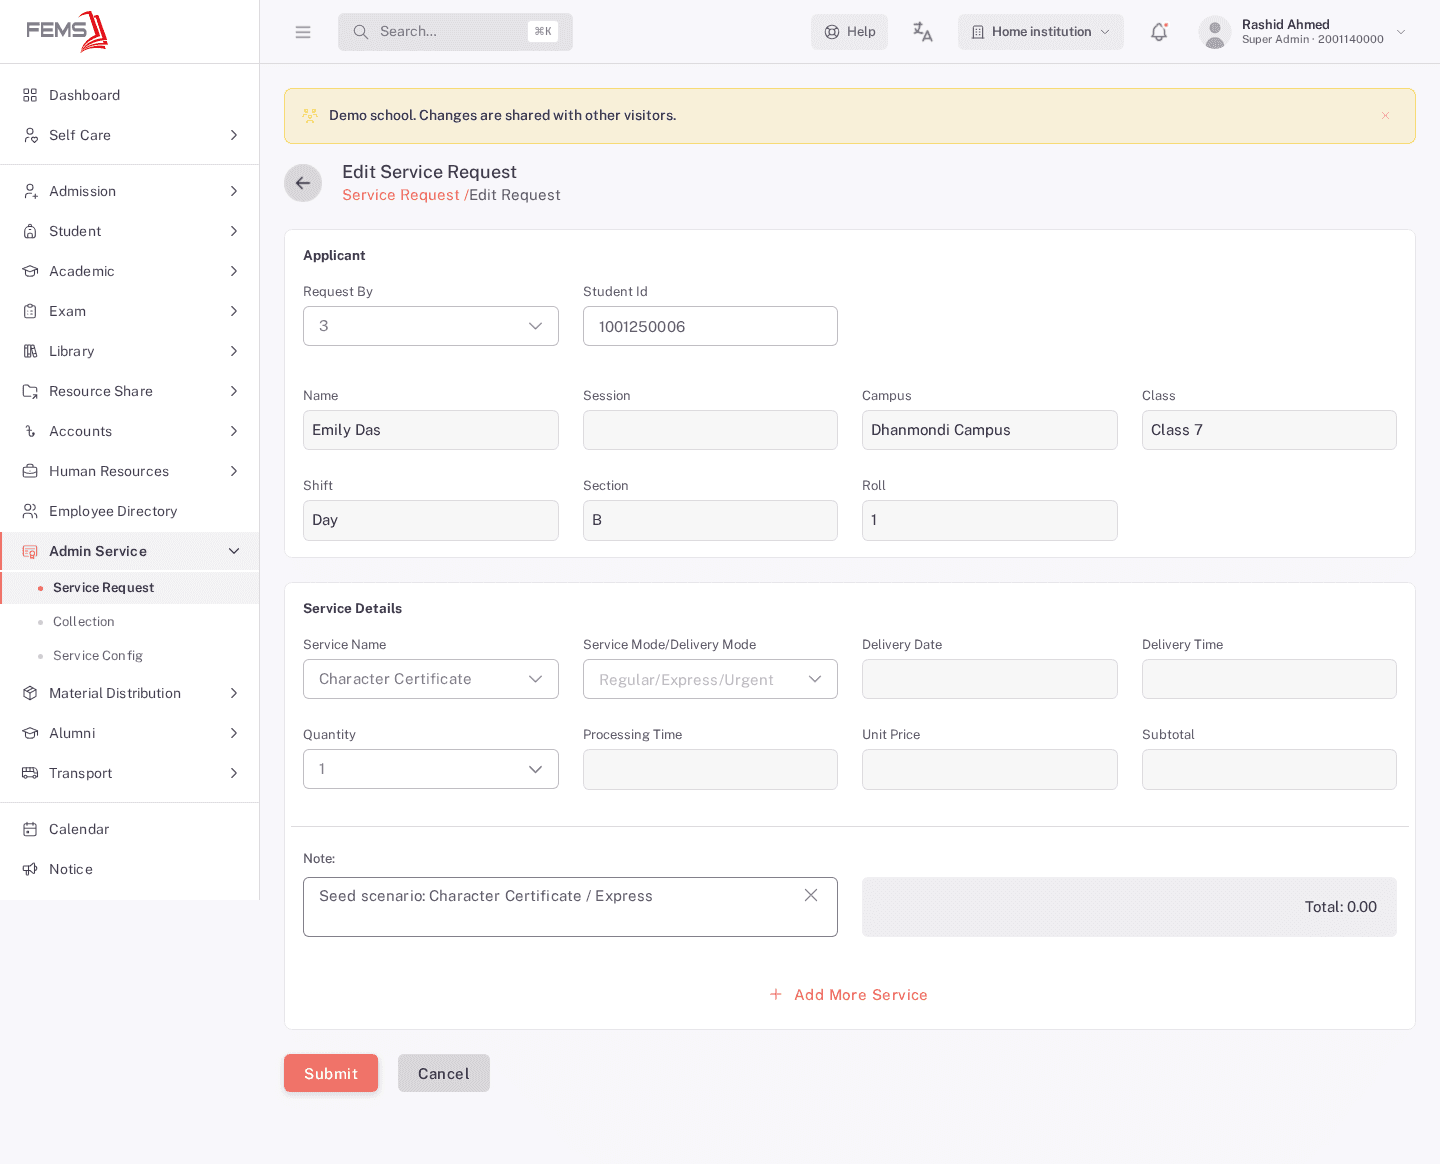
Open a request's row actions menu and choose Edit to change its fields. Editing is available for unpaid requests without an invoice whose status is Pending, Processing, Ready for Delivery, or Delivered. Paid, invoiced, cancelled, and unsupported-status requests cannot be edited here. Ask the school accounts office about any payment adjustment before changing a paid request.
Update the fields you need and click Submit. If another person has changed the request, reload its latest details before trying again.
Viewing a request and collecting a single payment
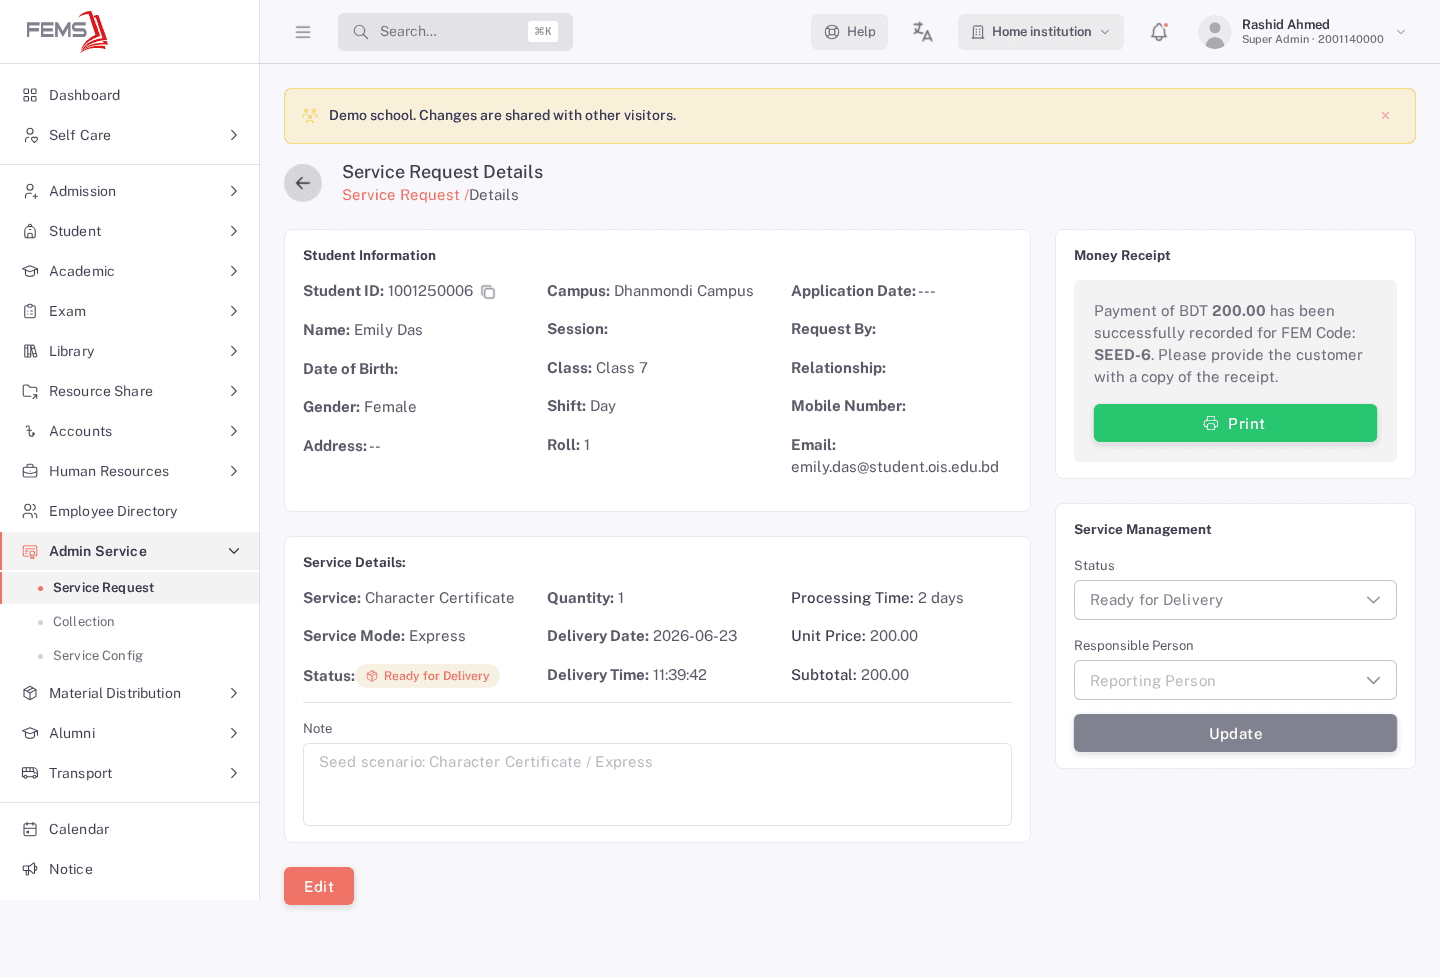
Open a request's row actions menu and choose View to see its full detail, including the applicant's read-only information and every service line item.
For an unpaid request without an invoice, use the Service Fee panel to collect payment. Cancelled requests cannot receive payment. If the request has an invoice, collect through the school's accounts payment flow instead. To record a payment here:
- Choose a Payment Method: Cash or POS. POS shows an extra Transaction ID field.
- Check the Amount.
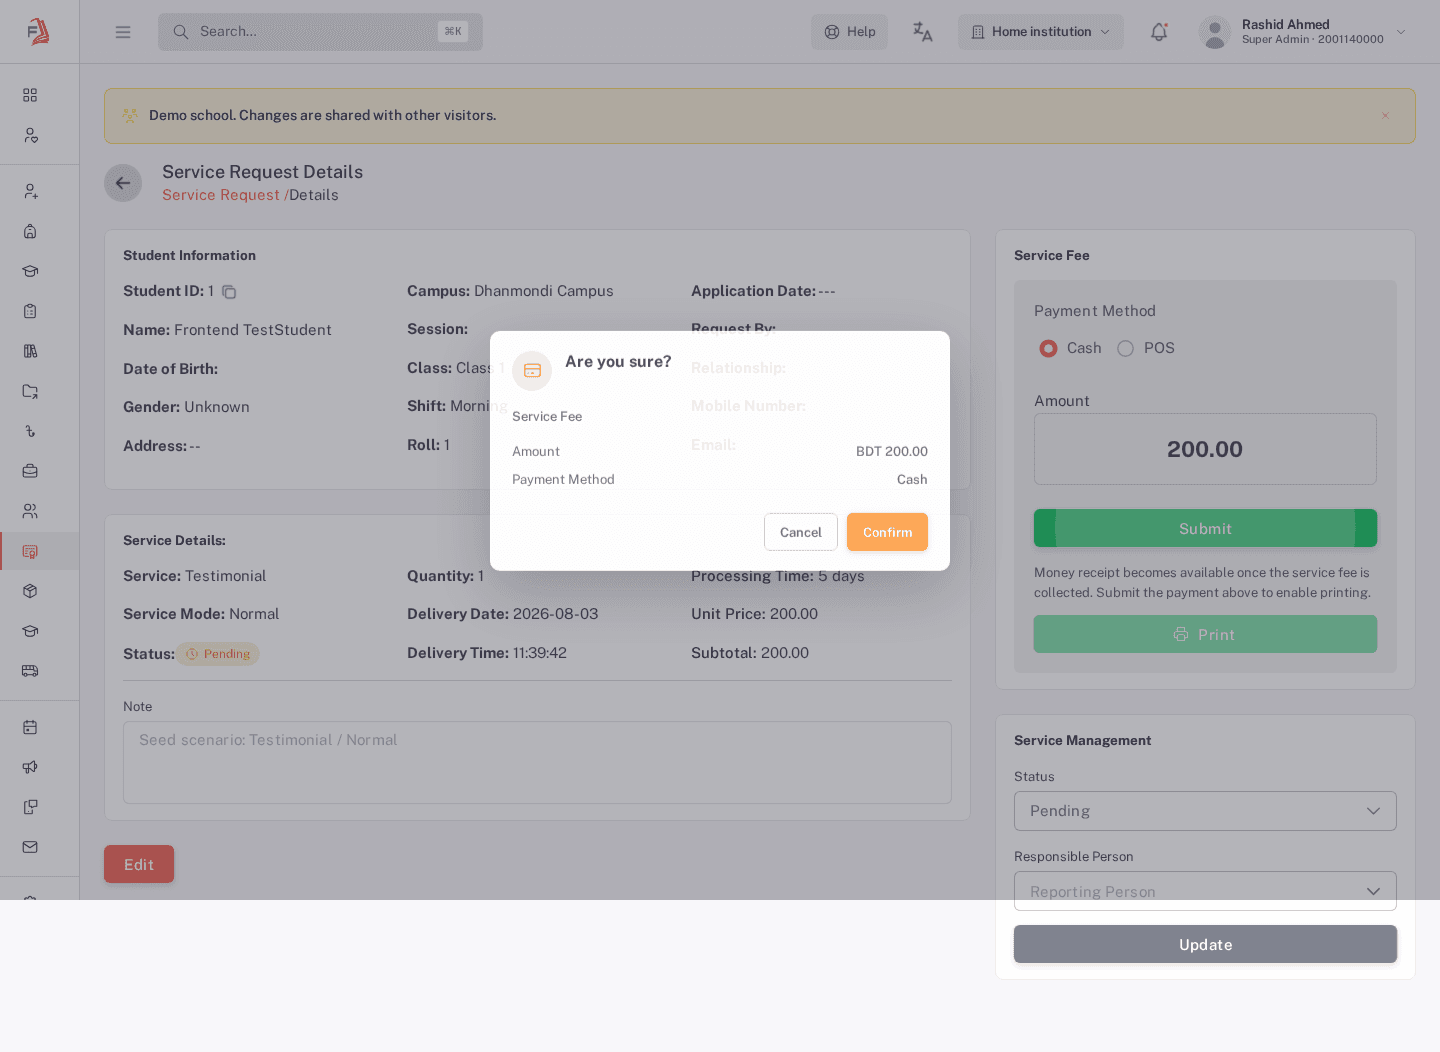
- Click Submit and confirm the amount, method, and reference in the dialog that opens.
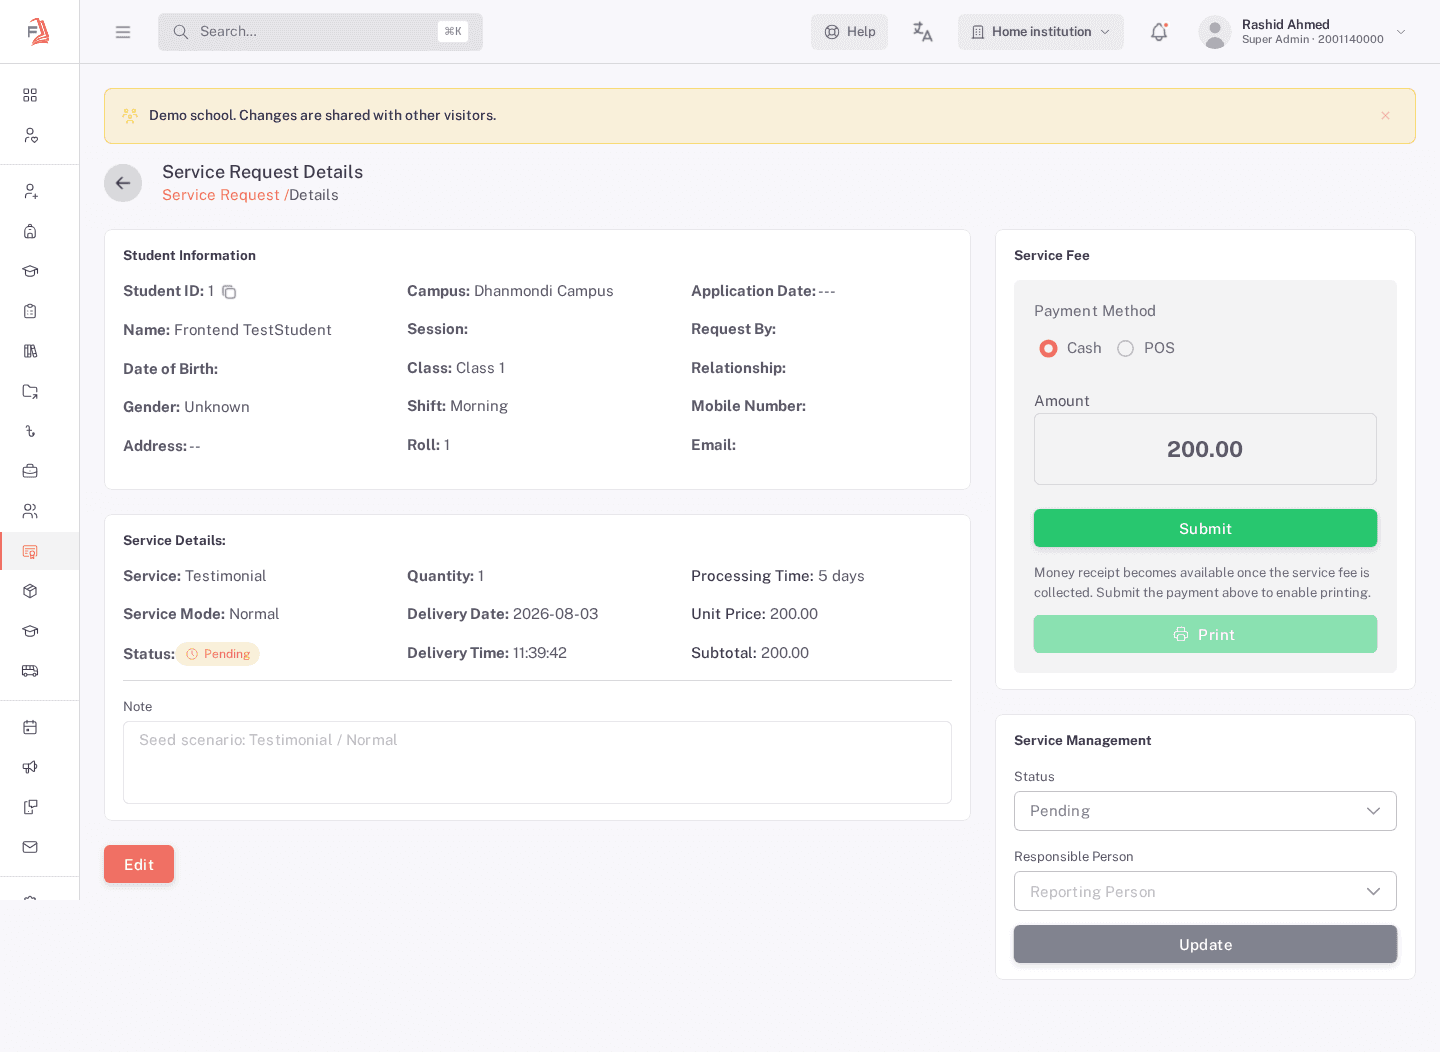
Once payment is recorded, the panel becomes Money Receipt, showing the amount and a reference code, and the Print button turns on. Below that, under Service Management, choose the request's Status (Pending, Processing, Ready for Delivery, or Delivered), then click Update. You need permission to update the status and access to the request. Cancelled requests cannot be reopened. Responsibility comes from the service's setup; the request details page does not assign a person.
FAQ
Do I need to set up a service before creating a request? Yes. The Service Name dropdown on the create form is built from the services set up on Configuring add-on services and payment modes.
Can I add more than one service to the same request? Yes. Click Add More Service on the create form to add another line item, each with its own service, mode, and quantity.
Can I collect payment while creating a request? No. Payment is collected separately, from the request's detail page after it's created.
What happens if I choose POS instead of Cash? An extra Transaction ID field appears so you can record the POS reference alongside the payment.
Who can update a request's status? You need permission to update service request statuses and access to the specific request. Ask your administrator to review your access if an update is refused. A job title alone does not grant access.